How to create a subscription product?
This is the very core of our platform right here! Hold tight, as this is going to be bit of a long read. If you're still wondering what subscriptions are, please see here. Now, without further ado, let's jump right in and find out on the best ways to build your first subscription product on Subbly
Types of subscription products
Being the only subscription-first eCommerce platform, Subbly tends to give a solution for every business and product setup one can have in mind. Before we proceed with the technicalities of the product builder, let's break down some most common product builds and play with some subscription lingo for a bit.
Given the flexibility of the platform, you're able to set your billing/shipping cadence in 1000's of ways. Some of the most common product setups are:
- Ad-hoc subscriptions
- Anchored subscriptions (with set renewal and shipping dates)
- Incoherent subscriptions (more than one shipment per one charge)
- Seasonal subscriptions (set renewal dates throughout the year)
- Membership subscription (no physical orders created, no shipping fees charged)
- One time products (just a simple one time product, which doesn't recur).
You can refer to each one of these for a detailed explanation and guide on how you can use Subbly to set them up.
Step-by-step product setup
Building a subscription product on Subbly's wizard flows naturally through 3 steps:
- Billing and Shipping Terms (mandatory to setup)
- Additional Settings (optional)
- Inventory (optional)
Continue reading below in order to get a detailed explanation of each one of these options. In the meantime, let's begin with the product's basic settings, the ones that you need to populate first before moving on to setting up billing/shipping setup of the product.
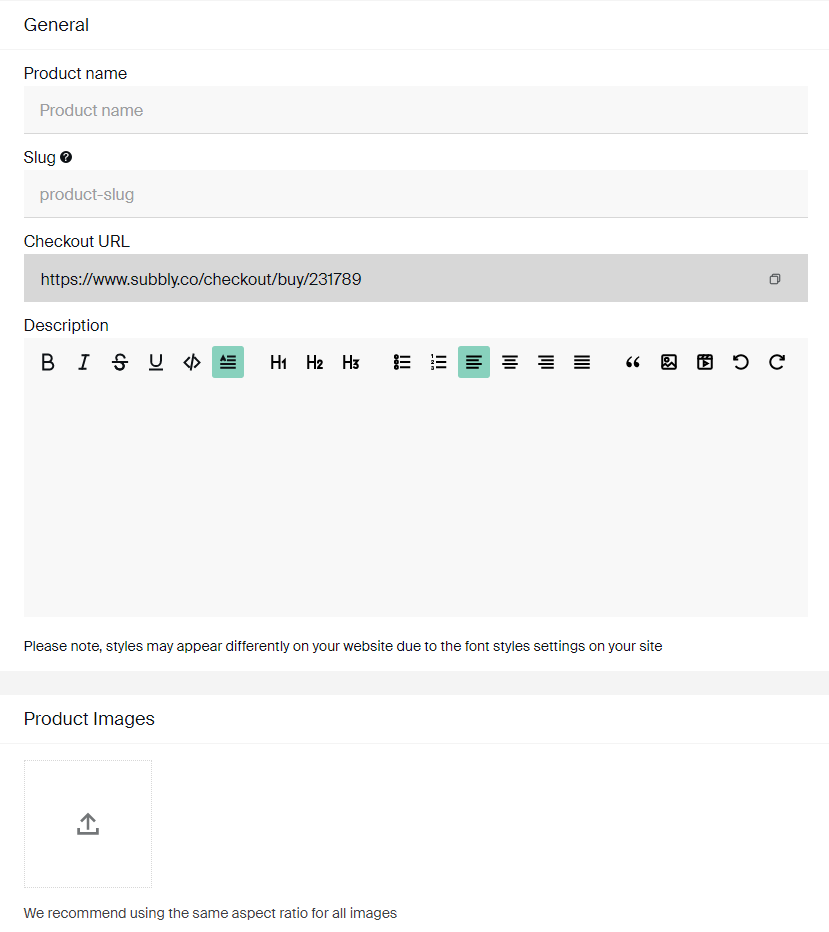
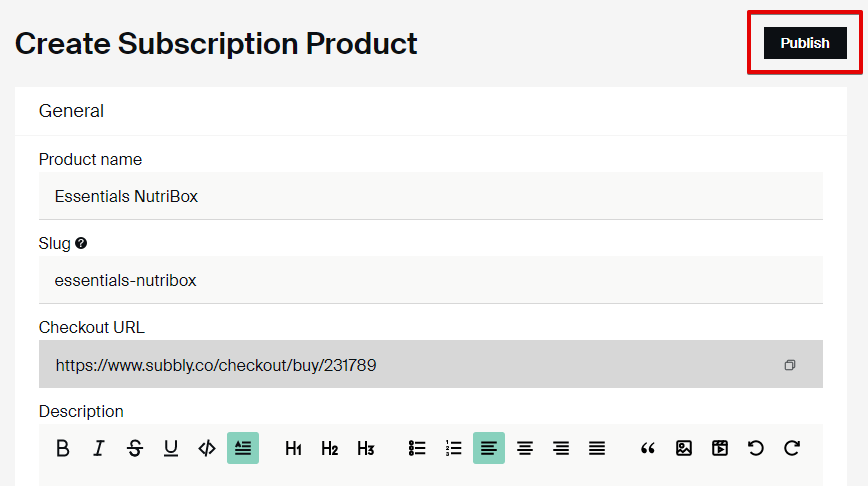
To kick things off, you will need to give the product a name. Slug will automatically populate based on a given name, but you will be able to change it as well for better SEO. If you're not sure what slug is, that's the suffix on the product page on your store front.
Checkout URL is the direct URL to the checkout page of your product which you can share with your customers and they will be taken straight to the checkout (bypassing the site).
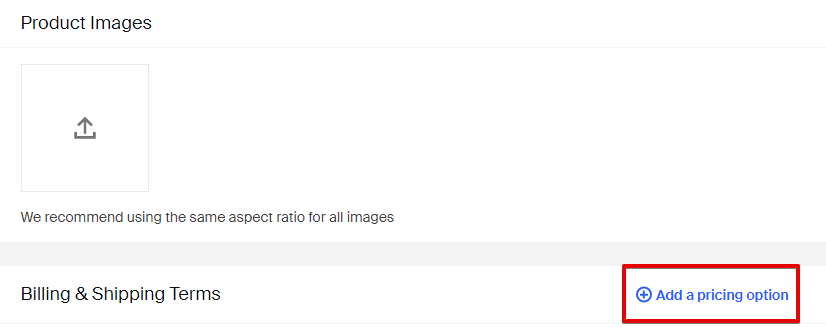
This is where you can also upload an image for your product and provide a bit more context to what the product is by filling in the description for it.
Step 1 - Billing and Shipping Terms
This is the actual heart of the platform and on this step you'll be creating your pricing options and will be setting up billing/shipping cadence for your products. You can start off by clicking on Add a pricing option button.
Remember that you're able to add as many pricing options to the same product. Why would you want to do this?
For example, you would want to offer the same product on different billing/shipping cadences (same product offered weekly, monthly, quarterly...).
Creating a pricing option
As there are literally hundreds of different possible product setups, we will simply go ahead and explain what each button does on the wizard here. For more detailed guide on how to build different types of subscription products, please refer to the first section of the article.
Auto name generation
Each product pricing plan carries a unique sub-ID and is treated as a separate product, it also has a specific (and unique) pricing plan name. Why is this important? Because different pricing plans for the same product will be presented to the customer whilst at the checkout. Subbly gives you the option to change and modify the name for each product plan you have to offer.
If you keep this toggle in its active (default) state, the pricing plan's name will automatically populate based on the chosen billing/shipping setup in the following format: X shipment(s) every Y days/weeks/months
If this sounds robust and not very appealing to the customer, you can disable the toggle which will give you the option to manually set the name for the pricing plan in question.

How often will you be billing your customers?
First and foremost, you are meant to set the price for the product.
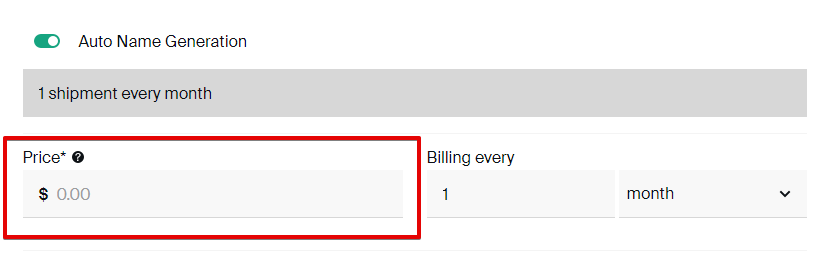
By setting up different combinations of numbers and time intervals (days/weeks/months) you can set whatever billing cadence you'd want. We cover literally all possible business setups.

Specific billing date - This toggle is only to be used if you're not about to handle your subscriptions on an ad-hoc basis, but you want to specify exact renewal date and/or shipping date along with the cut off date, and preferably the time of the day when the cut off date should end (only available on Advanced pricing plan). This is what we call anchored subscriptions.
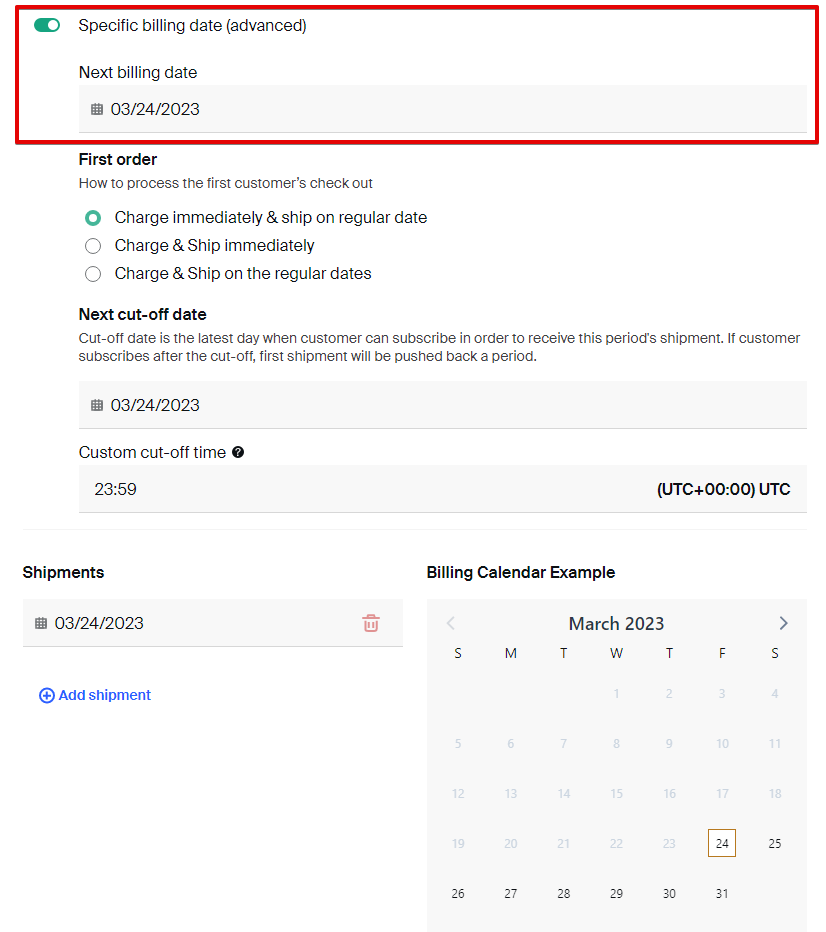
Next billing date controls the first next billing date for the subscription from where the subscription will pick up the regular cadence.
Next cut-off date controls the date after which the shipments will be carried over to the next shipping period.
Explanation of the options for how the first shipment will be processed can be found below:
- Charge Immediately and Ship on the Regular Date - customer will be charged immediately for the first shipment and the first shipment will be aligned with the first next shipping date as per the product setup.
- Charge and Ship Immediately - the first charge will be processed immediately after the checkout and the associated order will be created as well. Regular subscription will pick up from the next billing date as per the product setup.
- Charge and Ship on the Regular Dates - charge won't happen after the checkout but only on the next billing date and the orders will be created as per the product setup.
Finally, we've made it to the shipping part of the product setup, which calls for setting a shipping schedule of your product.
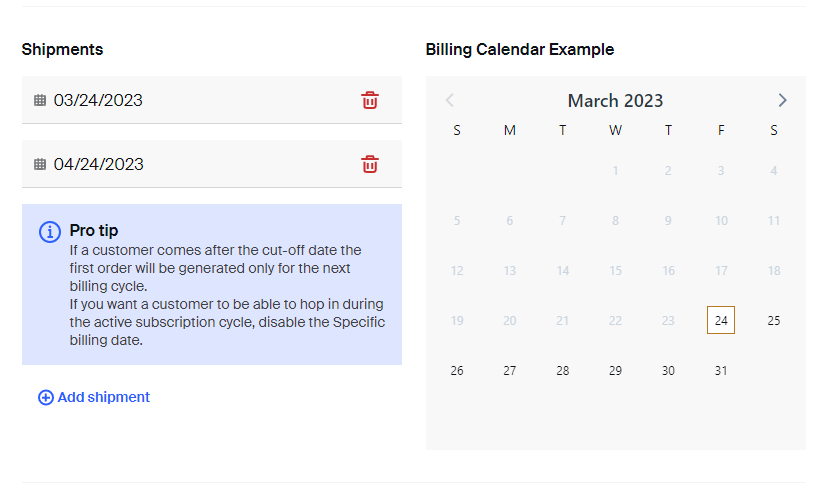
Options here will slightly vary depending on whether you're setting up your product as an ad-hoc or anchored subscription.
In general, you are able to add as many shipments within the same billing period as you'd want. You can add a new shipment just by clicking on the Add shipment button and specifying the date for it.
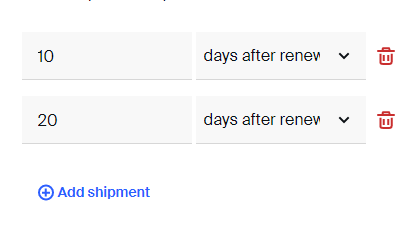
Easy, right?
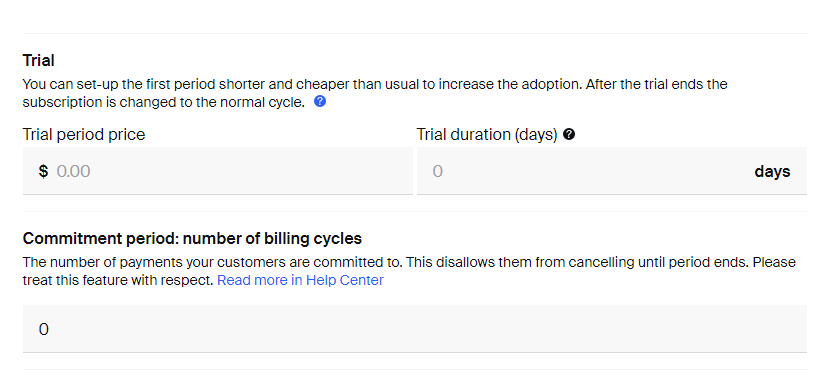
Commitment period is an optional tool that makes it possible for you to set the number of billing cycles during which your customers will be disabled from cancelling their subscription. You can see additional explanation on how commitment works here.
Trial period days/price is yet another optionality of the product setup and it will provide a solution for anyone looking to offer the first shipment at a discounted price (which proved to be a very useful tactic for some of our top tier merchants).
Select a survey lets you add/connect the predefined survey to the product or pricing plan in question. Given that you've already created surveys for the product prior to creating the product, all you need to do is go ahead and choose the survey from the drop down.

Step 2 - Additional Settings
This is where you control additional options for your product. Note that many of these are optional, which means that you're not mandated to utilize them, but it can come in handy.

Gifting controls whether the customers will be able to gift the product to somebody else or not. Please note that they are able to manage this directly on the checkout. More information can be found here.
Setup fee is a one time payment that's taken from the customers directly after the checkout and will not recur along with the subscription.
Pre order end date is the date when the subscription will actually start. This is to be used if you want to run preorders for your product in a way that, by signing up to your product, your customers will actually join the waiting list and will be charged for their first shipment only once the pre order end date has been reached. Additional clarity can be found here.
Product tax code applies just in case you are located inside the United States and if you're looking to pass specific product tax code to Taxjar for tax calculations.
Shipping information is to be utilized if there's anything in particular that you'd want to be present to your customers on the success page of the checkout that relates to the shipping of their products. Note that, whatever you have written down here, will be displayed to your customers at the time of the checkout.
Step 3 - Inventory
This is not a mandatory step. If you're using Inventory to keep track of your stock levels of to manage the handling of out of stock, this is where you can add inventory and SKU items to the product in question, by clicking on Add SKU.

Archiving/publishing a product
We've nearly made it to the end, but there are a couple of very important things that you need to take into consideration as well. First of all, if you've finished with creating the product make sure to scroll up to the top and publish it by clicking the Publish button as displayed in the image below.
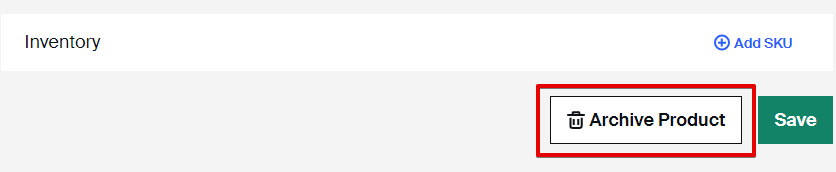
If you've changed your mind about specific product and you need it archived/deleted, scroll down to the bottom of the page and click on Archive Product. Archiving the product will remove the product from the list of active and published products on your store.
Duplicating an existing product
The Duplicate Product feature allows you to create a copy of an existing product with one click.
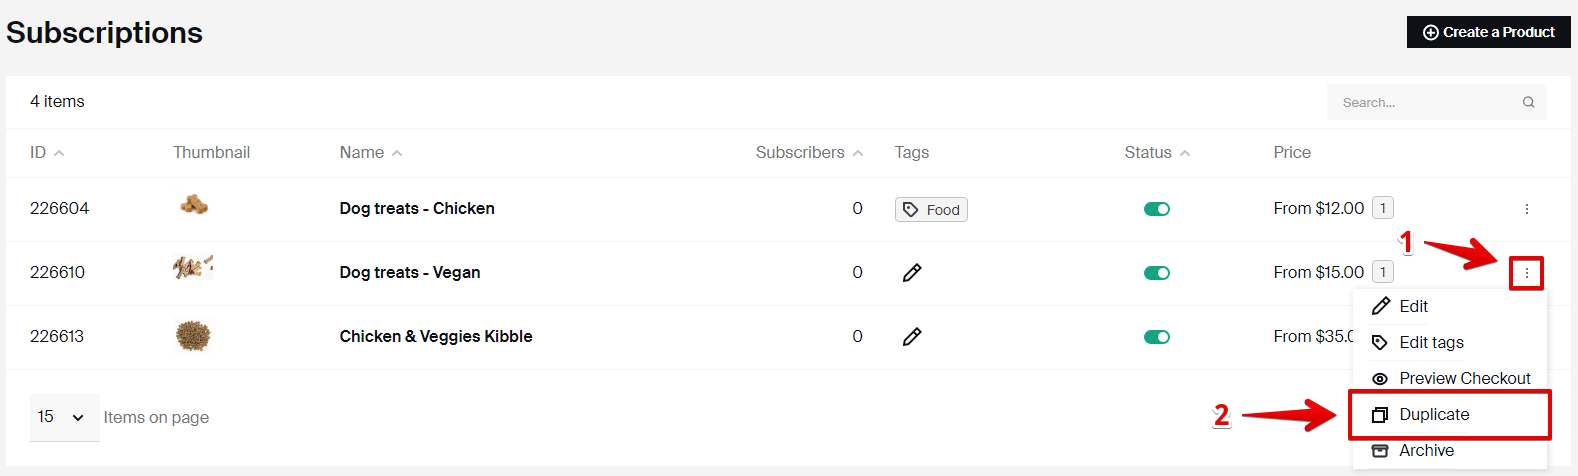
In order to duplicate a product you need to access your products tab and select Subscription products. Look for the product you wish to duplicate from your list, click on the 3 dots icon found on the right side of the product details and select duplicate.
Note that duplicating products will duplicate all existing pricing plans and settings.
If you have some questions, do let us know on chat!