Setting up subscription products

This article will guide you through the product builder wizard. Product builder wizard enables you to create the subscription product on a different billing/shipping cadence.
Getting Started
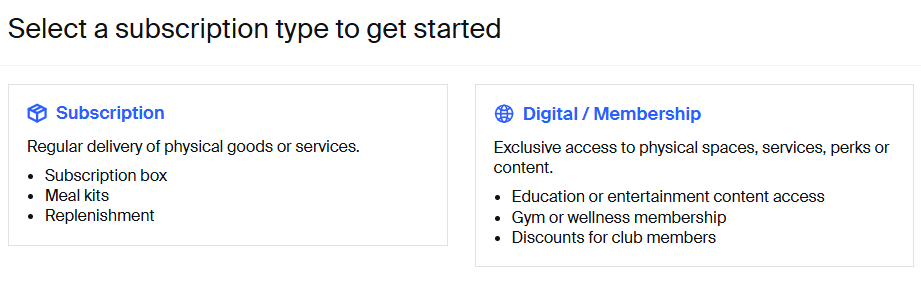
To start creating your first subscription product with Subbly, go here and click Create a Product. When prompted, be sure to choose whether you want to create a subscription product or a membership product.
If you choose to create a subscription product, you will be taken to the Product Builder Wizard.
General Settings
This is where you’ll find and specify general details for the product you are about to create.
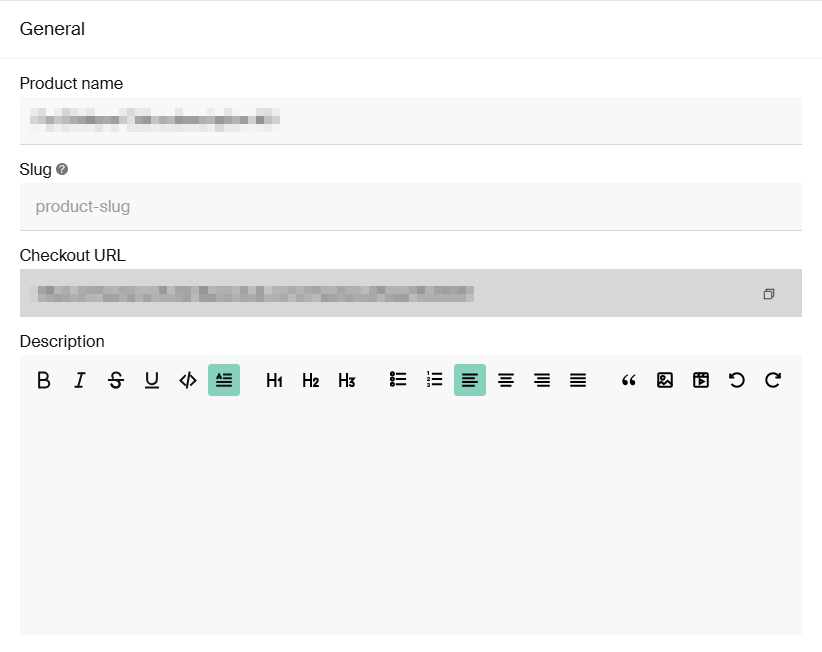
Product Name - The given name of the product. This is how your product will appear on your storefront, in the cart, or inside the customer portal for the customer. It also dictates the Slug of the product (please see the explanation below).
Slug - Automatically populates based on the product name but can also be changed manually. It dictates the URL of the specific product page on the storefront.
For example, if your store's name is mystore.com and the slug of the product is myproduct, the unique URL for the product page will be mystore.com/myproduct. You can also change this manually.
Checkout/URL - The checkout URL for the parent product. Cannot be changed.
Description - Add a description for the product. The product description is only visible on the product page (if hosted with Subbly). It is not visible on checkout pages or inside the customer portal.
Product images - Click to upload product image(s) for your product. You can upload an image from your hard drive or use free image repositories. You can upload up to five different images for the product.
Subscription plans
In this section, you can specify the billing and shipping cadence for the product.
Plan Name - The plan name is automatically generated based on the billing and shipping cadence set for the product (for example, "1 shipment every month" for a simple monthly subscription). Turning off auto name generation allows you to manually edit and specify the subscription plan name.
The plan name will appear:
- At checkout
- On customer invoices
- In your admin panel
Price - The price field specifies the product price, excluding any shipping fees or taxes, which may be added at checkout.
Bills every X months/weeks/days - This setting determines how often the customer is billed for the selected product.
Independent vs Synchronized cycles
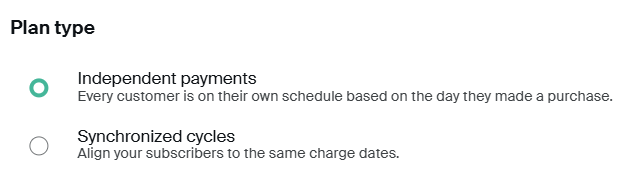
There are two main plan types that you can create on Subbly:
- Products on independent billing cycles are the products that are always keeping the customers billed on their anniversary date for their subscription. Example would be somebody who subscribed on the monthly plan on the 8th of March will be billed on every 8th of the month going forward.
- Products that are on synchronized billing cycles will align customers to be billed on the specific date of the month. Example would be charging your customers on every 1st of the month regardless of when did they sign up for their subscription.
Independent billing cycles
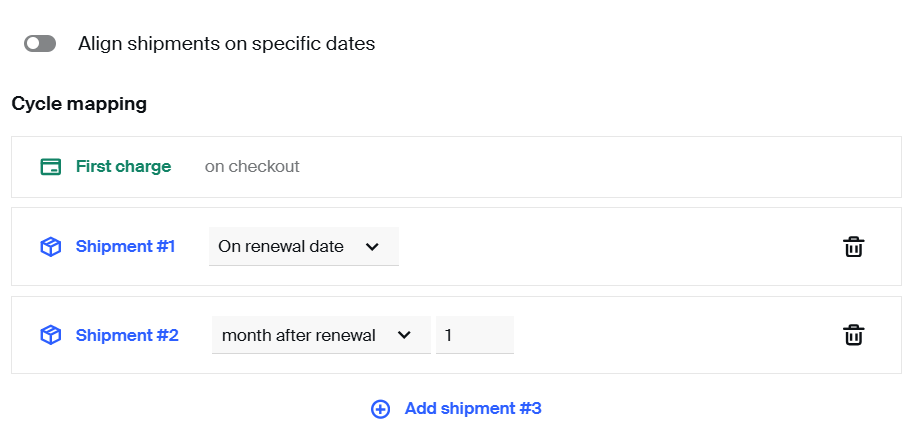
When setting up products that are on independent billing cycles the product setup is pretty straightforward. One thing you will need decide on is the shipping frequency of the product. More specifically you will need to decide on:
- How many shipments will the customer get per one billing (you can add more shipments to the same billing term by clicking on +Add Shipment # button.
- Is the shipping date going to be the same as the charge/billing date or is it going to be different (you can specify the shipment to come X days after the renewal or you can specify it to align to a specific date by toggling the Align shipments on specific dates toggle)
Synchronized billing cycles
Setting up a subscription plan with synchronized billing cycle will make it possible for you to create the product whose billing/shipping cadence is aligned with a specific billing/shipping frequency that repeats in given time intervals (for example, always bill on the 1st of the month and always ship on the 15th of the month).
Cycle mapping is a bit more complex with this plan type so we'll explain each toggle separately.

First charge - This toggle specified when the first charge will be taken from the customer.
- On checkout will take the payment immediately after the checkout is finished, regardless of what the next renewal date is for the customer.
- Specific day will prolong taking the first payment from the customer until the next scheduled renewal date for the product.
If you choose to charge the customers at the checkout, you will also have to specify when the first shipment will happen. Choosing the first charge happening on the specific day will automatically align the first shipment day with the Shipment #1.
Renewal day - This specifies the first next renewal date for the customer. Please note that date is dynamically changed on the widget and you are able to see the next logical increments of next billing dates depending on your chosen billing cycle (for example, in the screenshot above we see an example of a regular monthly product, with next renewal dates scheduled a month apart each).
Cut off - Cut off is defined as the deadline when the customer can subscribe in order to be on time for this period's shipment. We have separate article on how cut offs work here. However, it's important to understand the different implications of setting up the cut off to come before or after renewal dates. Please check the box below for different examples.
1st example - Let's say that you're running a monthly box that is charging your customers on every 1st of the month with the shipping happening on the 15th of the month. If you're collecting money from the customer at the checkout, you will need to decide what's the final day when the customer can actually subscribe in order for them to be eligible for this month's box (going out on the 15th). Logically, if they subscribe on the 16th of the month they will already be past this month's shipping date so their shipment is going to be on the 15th of the next month, with their first renewal also being pushed back a month.But what if they subscribed on the 12th? Or on the 10th? Are they still late? Question you need to answer here is how many time do you actually need to pick and pack your customer's box. If lead time for sourcing and packing the product is only a few days, then you most probably want to aim to get the cut off date somewhere around the 10th. Given that the 10th of this month is logically after this month's renewal date (which was on the 1st of the month) you will want to choose that the cut off comes after renewal in this instance.
2nd example - Let's take the same example as above with an exception that, in this instance, you actually need significantly higher lead time to source the product and pack customer's first box. Let's say that you actually need 30 days in order to deliver the box to the customer. If you charge on the 1st and ship on the 15th that leaves us with 15 days in between, but you need 30.This is where the cut off date will need to be set on the 15th, but set to come before renewal in order to give us 30 days needed lead time for the boxes to be packed. If today is the 2nd of March and the next renewal for the product is the 15th of March - if somebody was to subscribe today they will already be late for this month's shipment because the cut off date for March box was actually 15th of February. If this is confusing, please make sure to consult the customer support team on how you should setup your cut off dates.
First shipment - This one specified when the first shipment will be created for the customer. This toggle is active only if the first payment is happening on the checkout. Similar to the first payment toggle, this comes with 2 different options - after checkout (creates the order/shipment directly after the checkout) or specific day (will align the shipment with the shipment #1 specified below).
Shipment #X - Specified the shipping cadence. You can select the shipping date by selecting the date from the calendar widget.
Advanced settings
In this section, you'll find advanced settings you can use to enhance your product setup.
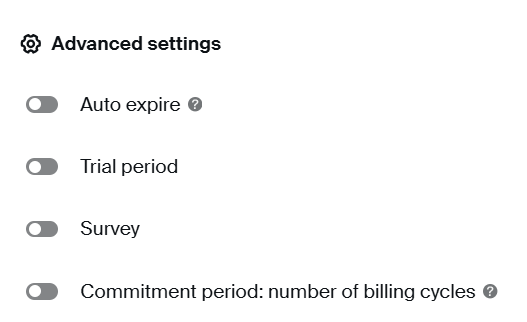
Auto expire - Sets the product to auto expire after certain number of billing periods. Read more on how this works here.
Trial period - Adds a trial period with different billing schedule and separate price for the trial term. Learn more about this functionality here.
Survey - Connect the survey to a specific subscription plan. Learn more about how surveys work here.
Commitment period - Set the minimum number of periods the customers will have to be subscribed to the product before they are able to cancel. Learn more about this functionality here.
Additional settings
All fields in this section are optional. At this point, your product setup is pretty much done but please continue reading to understand what additional settings are available for the product.
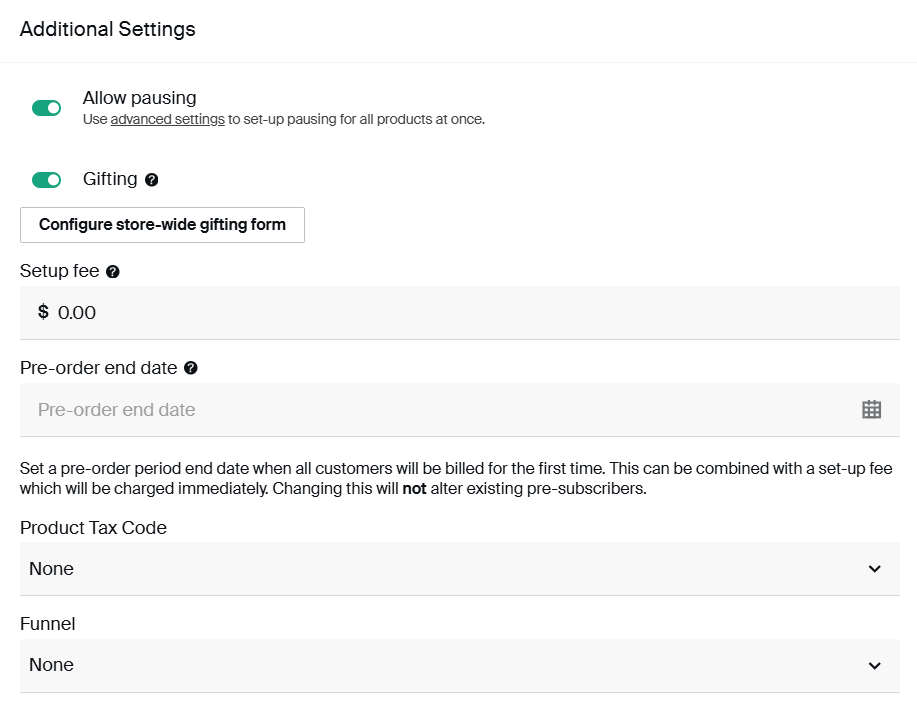
Allow pausing - This toggle is by default enabled. This controls whether customers subscribed to this product are going to be able to pause their subscription or not. You can learn more about how pausing works here.
Gifting - This toggle is enabled by default. Enabled means that the customers will be able to gift the product while checking out. If it's disabled, customers will only be able to buy the product for themselves, without going through the checkout as a gift. Learn more about how gifting works here.
Setup fee - One-time fee that is charged right after the checkout. Does not create the extra order.
Pre-order end date - Useful if you're still in prelaunch phase and want to make your product becomes available only at a later date. Setting up the pre-order end date will pause collecting all payments from customers until the preorder end date has been reached. Until then, customers will still be able to finish checking out on the product. Their subscription and customer profile will be created on the admin, but the first payment will get scheduled for the pre-order end date. Learn more about this functionality here.
Product tax code - Useful if you're using Taxjar integration to pass different tax codes for different types of products in case some of them should be tax-exempt. Learn more about how taxes work here.
Funnel - Adds the product to the specific funnel. Learn more about funnels in the separate article here.
Shipping information - This is a free input field. Information included in this field will be presented to the customer on the thank you page of the checkout, ie., it will be shown to the customer once they finish checking out.
Inventory item - Adds specific inventory item (SKU) to the product in question. Learn more about how inventory works on Subbly here.