Setting up lead forms and converting leads

This article covers the topic of using Subbly for collecting leads from your website and converting those leads into paying customers by automating flows.
Definitions (leads, customers and lead forms)
Anybody who visits your page and subscribes to the email form or other lead magnet is considered a lead. Lead gets promoted into a paying customer when he/she finishes the checkout on your store and gets to actually buy/subscribe to something. You can fully automate this process through Subbly!
Managing leads
All email subscribers that subscribe through your Form element on your Subbly site are automatically added to the Leads section of your admin. From this section of the admin you're easily able to:
- check on the lead list and manage it
- filter out the lead list to understand who converted and who did not
- setup and customize lead forms which you can embed on your site to collect leads
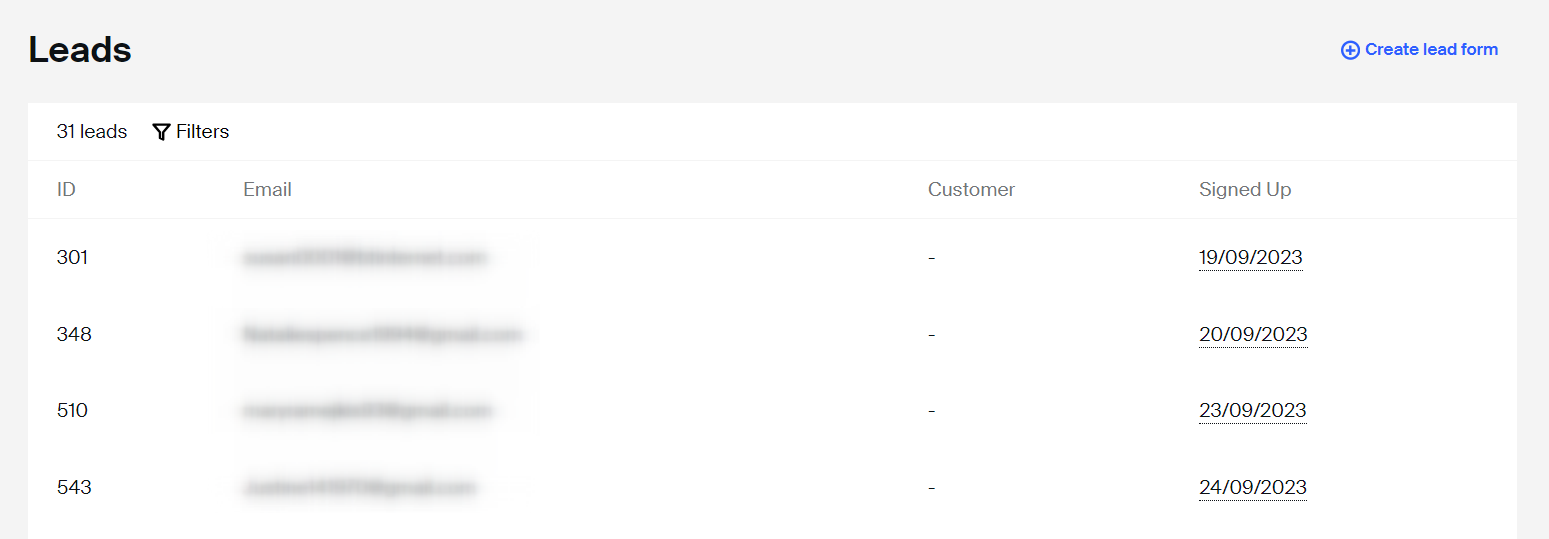
Explanation of the columns you can find on this page can be found below:
- ID - id of the lead recorded
- Email - collected email from the lead
- Customer - can get either yes or no (none) value, depending on whether it converted to a paying customer (finished the checkout after becoming a lead) or it didn't yet
- Signed up - date when the site visitor subscribed to the lead magnet and was added to the list of leads.
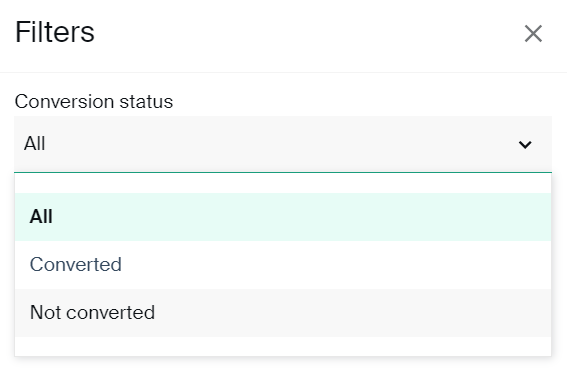
Filtering the leads
You can filter the leads based on whether they are an active customer or are yet to convert to an active subscriber.
Creating lead forms
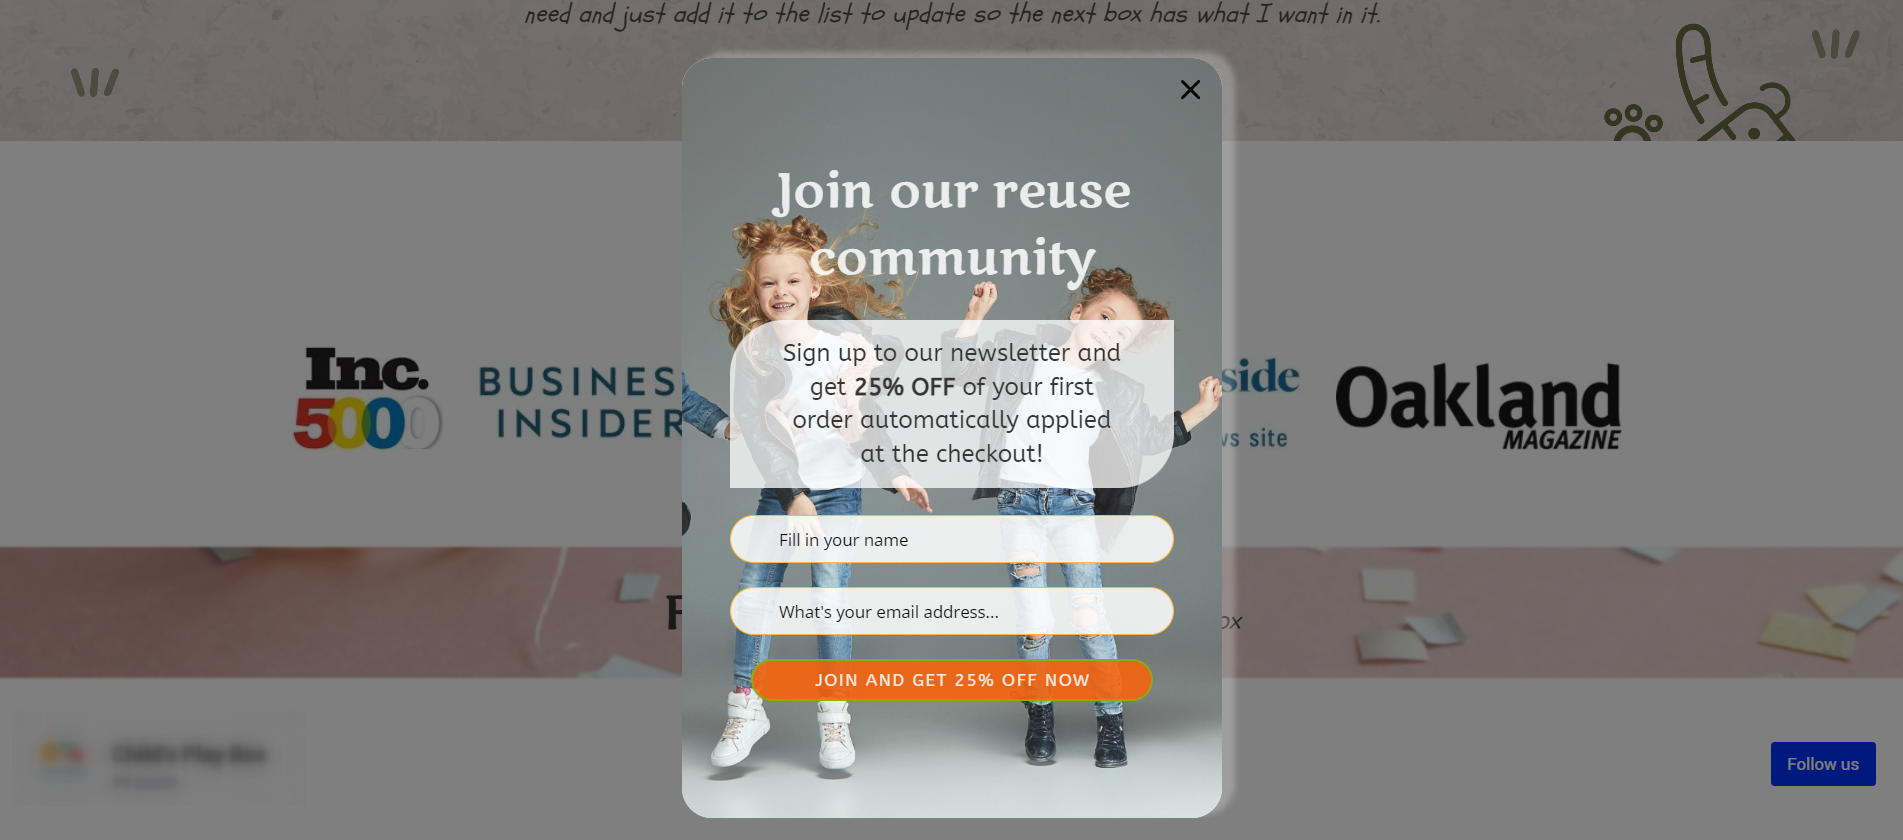
Creating an appealing lead magnet falls down to providing value to the site visitor so they get incentivized to subscribe to the email newsletter in the first place. Incentive can be either in the form of the discount applied to their order (or first payment) or in the form of a free item. Some obvious marketing tactics you can consider using are one of the following ones:
- Sign up for our newsletter to get 25% OFF applied to your checkout NOW!
- Sign up for our newsletter and get free PDF recipe book (worth $159) in your mailbox!
Examples of how these would look on your store can be found below:
Or if you're giving out the PDF here's how one nice lead magnet looks like:

Subbly gives you the option to create visually appealing lead form that will work by using our built-in lead form builder. Once logged in to your Subbly account, make sure to go here in order to get to the lead form builder.
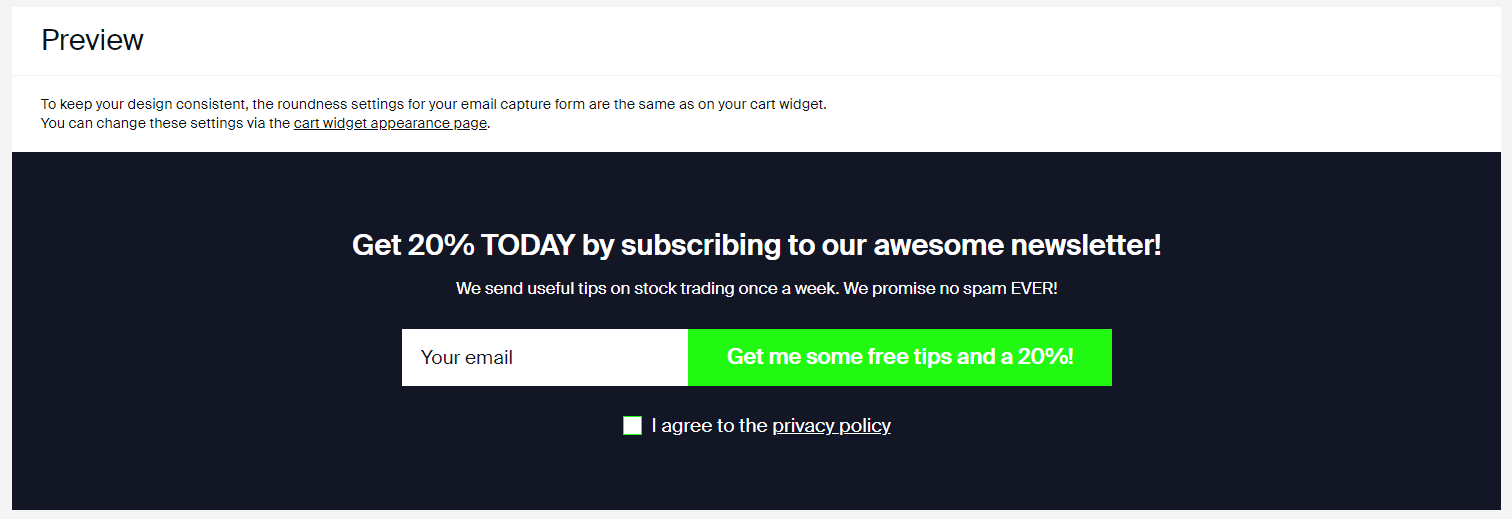
Lead form builder is pretty straightforward and you get to modify settings such as changing the title, subtitle, prompt for the CTA button, as well as modifying the brand colors (for the background color of the form or CTA background or text colors).
On top of this, there are 2 optional flags (toggles) which you can use to your liking:
- Show privacy policy consent checkbox - optionally adds the privacy policy checkbox to the form (you can paste the URL to your privacy policy in the corresponding field)
- Apply a coupon after form submission - automatically applies the coupon immediately after the visitor submitted the form and left their email (ideal for driving some immediate conversions whilst they are still on site)
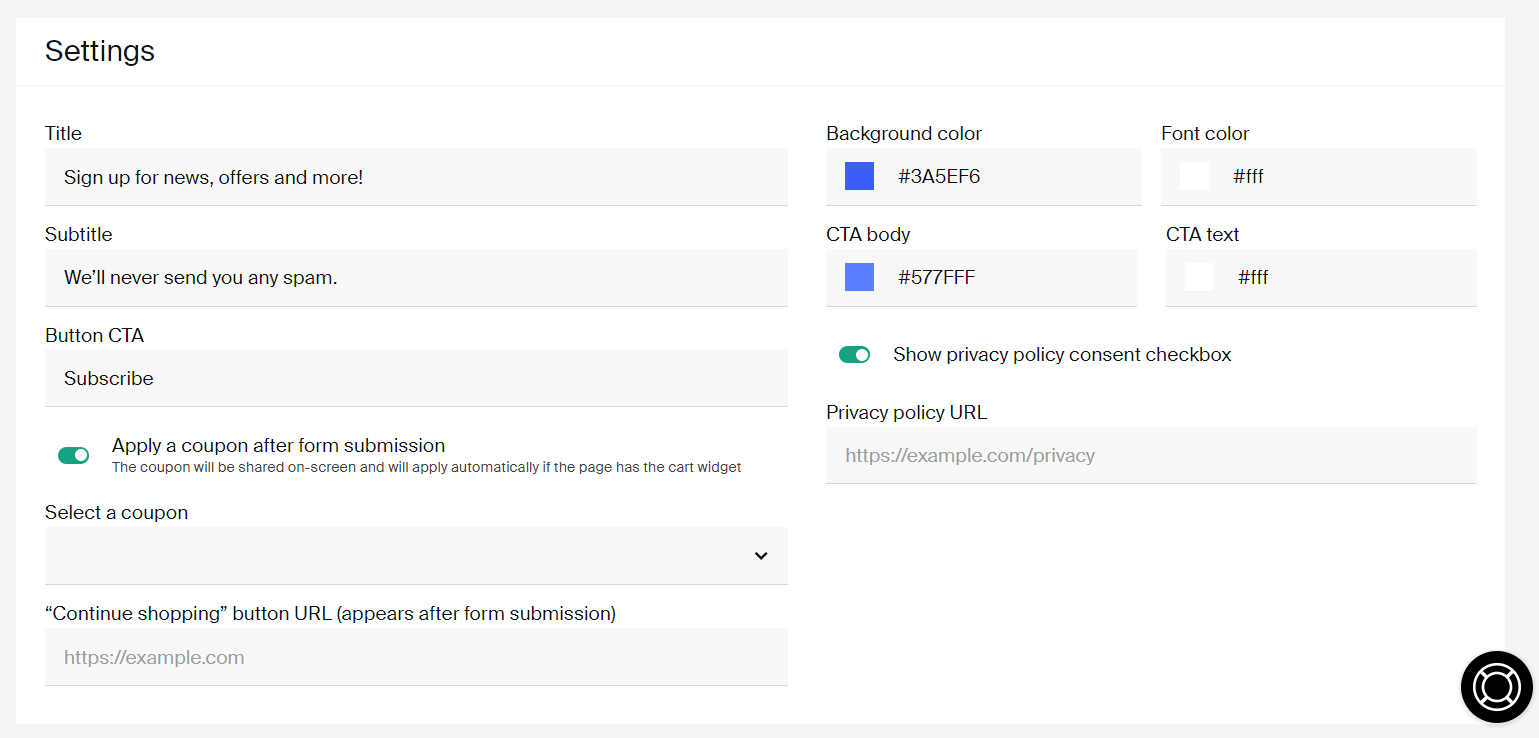
Down below, you will be able to preview how your lead form will look like when embedded on your site.
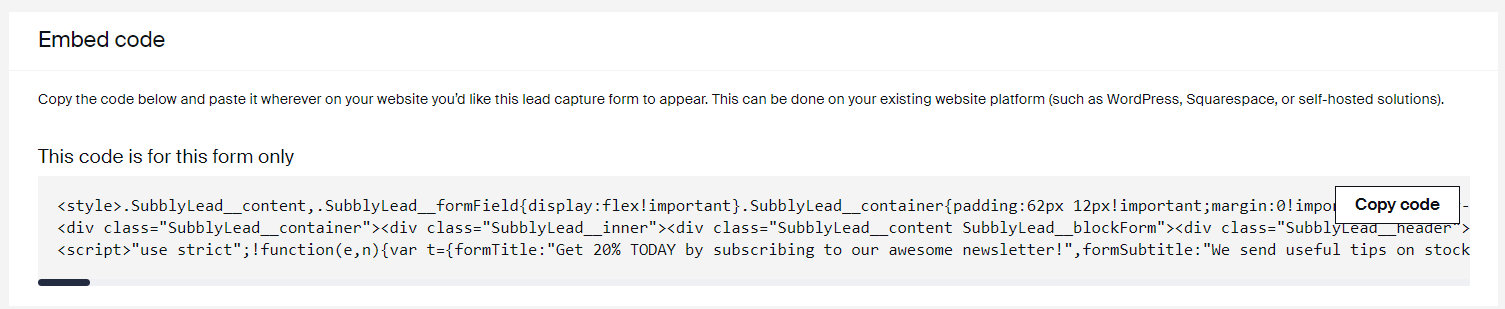
Embedding lead forms on your site
Embedding lead forms is as easy as copying the Embed Code and pasting it on your external site. Once you create your lead form (as explained in the previous section) just make sure to grab the embed code and paste it wherever you want on your site and the form will be displayed there.
Connecting the lead form with Form element
If you've already built your site using Subbly's website builder, you probably already got the newsletter form built already by using one pre-built element on the website builder (Form element). If this is what you did, than you don't even have to create the lead form and embed it to your existing site. We've made the integration backwards compatible and Leads functionality is already working seamlessly with pre-built Form element.
In a nutshell - whoever subscribes through the Form element will automatically get their email recorded on the Leads section inside the admin.
Additionally, if you'd want to get the coupon pre-applied to whoever subscribes through the Form element on site, you only need to include small piece of code inside Append Custom Code menu of the Form element. Here's what you should do:
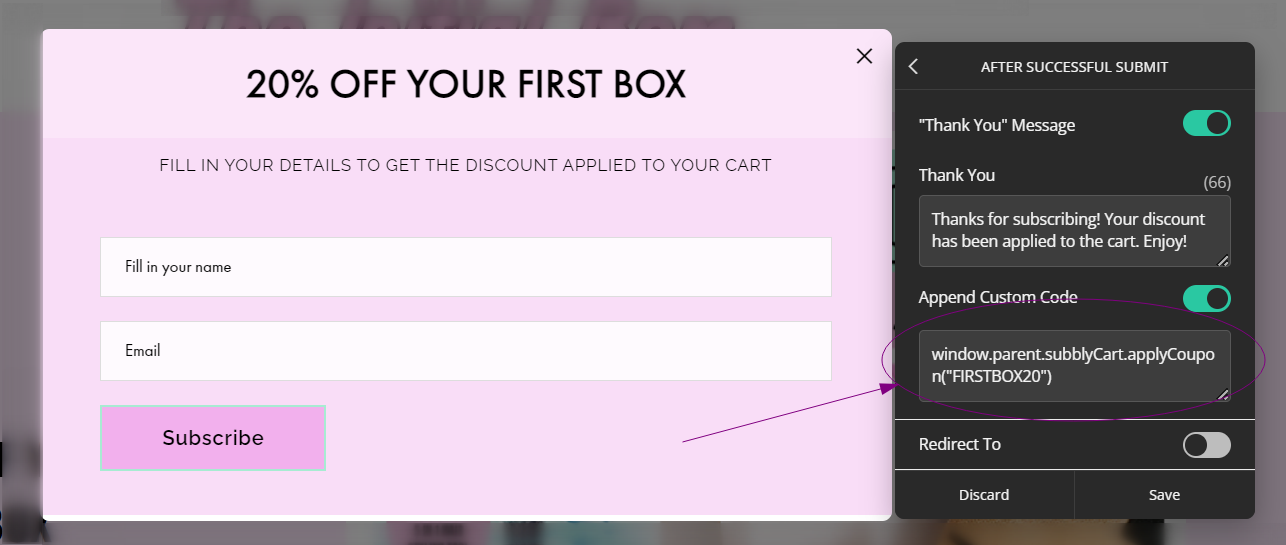
Code that needs to be input here depends on whether the Form element is included in the regular body of the page or is on the popup. If it's within the regular body of the page the code you'd need to paste here is:
subblyCart.applyCoupon('COUPON_ID')
If the Form element is inside the popup (added through Popups App on the Subbly website builder) than this is the code you need to paste there:
window.parent.subblyCart.applyCoupon('COUPON_ID')
You're good to go!
Automatically send an email via Automations
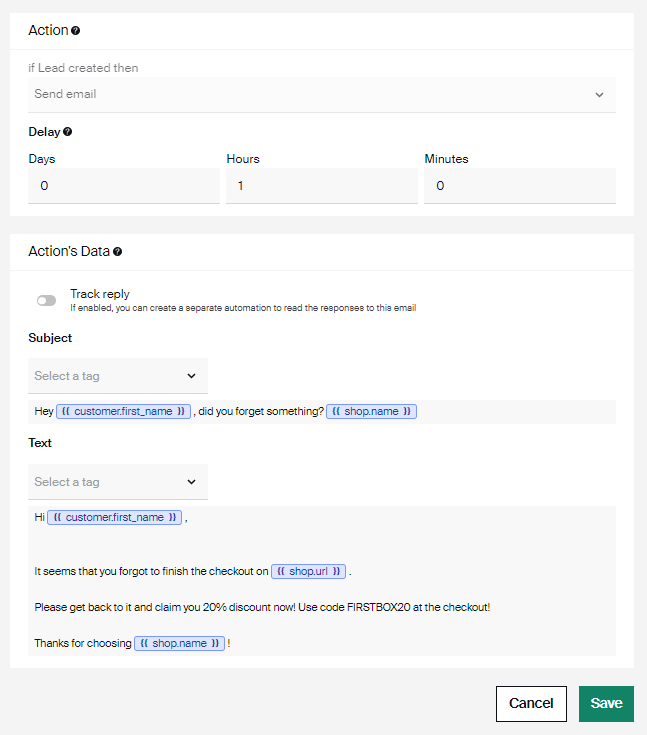
What if customer didn't end up converting even though you've got the coupon pre-applied for them. And how to get the PDF previously mentioned actually sent out to the customer once they've subscribed to the newsletter? It's time that you build some automated workflows by using Subbly's automations.
Automation setup is simple and it should consist of the following elements:
- Trigger: Lead Created
- Action: Send Email
- Condition: None
Connecting the dots (video tutorial)
If you're feeling overwhelmed by everything you just read on this article, don't forget that it barely takes 10 minutes to set everything up. For inspiration purposes, here's a short video on how our team did that for one of our clients.
This is just a glimpse of opportunities and what you can do with Subbly's lead forms and automating the workflow through Automations. Have another use case we didn't cover in this article? Please make sure to message us with how are you using Subbly!