Organize better and increase efficiency by grouping customers and products using tags, or streamline internal processes and get the most out of the builer by applying metafields to your products.
Introduction
To access this section on your Subbly admin navigate to Settings, and then to Metafields and Tags (click here while logged in to access it immediately).
From here you're able to easily view, add, or delete existing metafields or tags.
Creating tags and/or metafields
To create a tag simply click on the Tags label on your admin and choose to Add New Tag as in the picture below.
To create a metafield, click on the Metafields label and choose to Add metafield as in the image below.
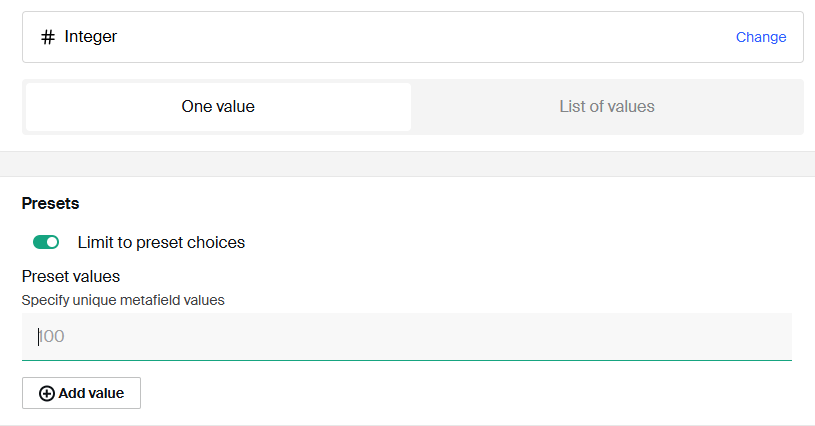
Unlike Tags (that are single type), metafields can have different types and you'll be prompted to select the type of the metafield when creating one.
Below is a list of all available metafield types with short explanations of what each one of these do:
Date and time - can add date and time to the checkout in the calendar format
Date - can add only calendar widget for selecting the date on the checkouts (useful for collecting customer's DOB)
Time - collects time preference on the checkouts (useful for meal prep delivery businesses)
Volume - adds value field for volume of the product (useful for separating different products by volume on site)
Weight - adds value field for weight of the product (useful for filtering products by weight on the site)
Integer - adds integer field to the checkout
Decimal - adds decimal field at the checkout
Single-line text - adds the free text input field at the product's checkout (single line, useful for short answers)
Multi-line text - adds the multi line free text input (useful for collecting longer text preferences)
Rich text - adds rich text field at the checkout (useful for adding rich formatted text fields at the checkout)
True or false - adds boolean separator for the checkout fields (useful for curation boxes collecting customer's preferences)
Color - adds the color field(s) for the product (useful for filtering products based on the colors on site)
Rating - adds the number field to the checkouts
URL - adds the specific URL to the product's checkout (useful for adding video links in product's descriptions)
Money - adds the number field to the product's description or to the checkouts
JSON - adds the ability for the user to add the JSON field to the product's description or to the checkouts
When choosing specific types for metafields, you are able to preset values customers will be able to choose from. Similar to this, you are able to choose whether the metafield will have only single value or multiple values to choose from.
For some practical uses of these features, make sure to read through the Practical Uses sections below.
Both tags and metafields can be automatically fetched from Subscription API and they can be used both with the AI Builder or with some external integrations built on top of the API.
Practical Uses for Tags
With introduction of the new AI Website Builder, practical uses for tags are getting narrowed down to operational side of the business. Experimenting with the storefront (applying product filters or building complex checkout flows for curation) is something that you should be using metafields for.
Some of the most prominent practical uses for Tags in your everyday Subbly life are listed below.
Tagging products for easier filtering on the admin
On the products section (Subscriptions, One-time products, or even Bundles), add tags directly from the section, like this for example :
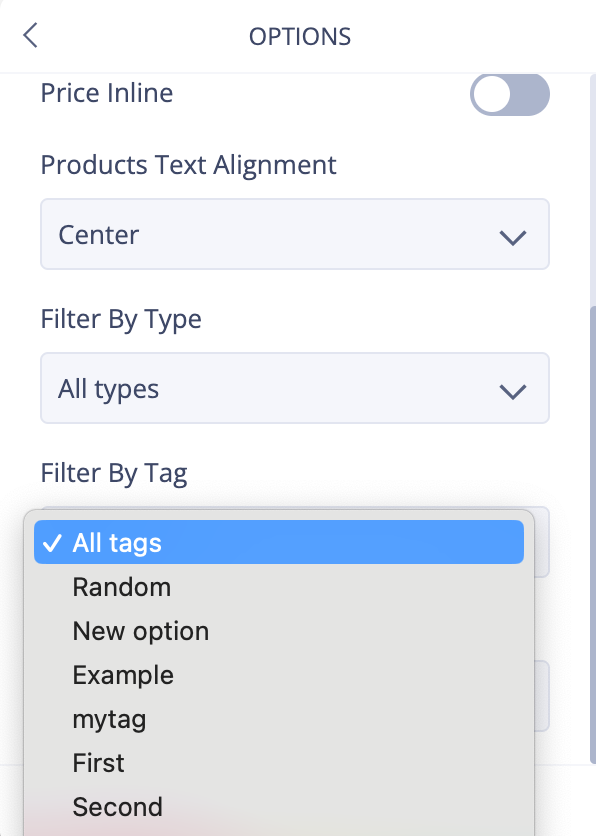
If you are using legacy website builder, you can take advantage of tags to filter which products will be displayed when using the Products element. After tagging the products as explained in the section above, you will be able to go into the Products element > click to Edit > Options > Filter by Tag and select which one you want to use:This can be pretty handy if you want to have separate pages to showcase different products or if you are trying to show specific lines of products organized by rows on the same page, for example.
Tagging customers for advanced filtering in the admin
From the Customer profile, scroll to the Tags section and apply the existing tag for the customer.
Alternatively, you can do it in bulk from Customers section as in the picture below.
Tagging customers can be very useful if you're wanting to create different batches of customers for easier tracking or for applying a batch action for specific batch of customers. Let's say that you're running a special promo where anybody that gets subscribed between two dates are getting a discount on their next order. You can filter out the customer's that subscribed (had their subscriptions created within certain dates) and then batch apply specific tag to them. Then you can filter out customers by this tag and batch apply previously created coupon which will assign % discount off of their next order.
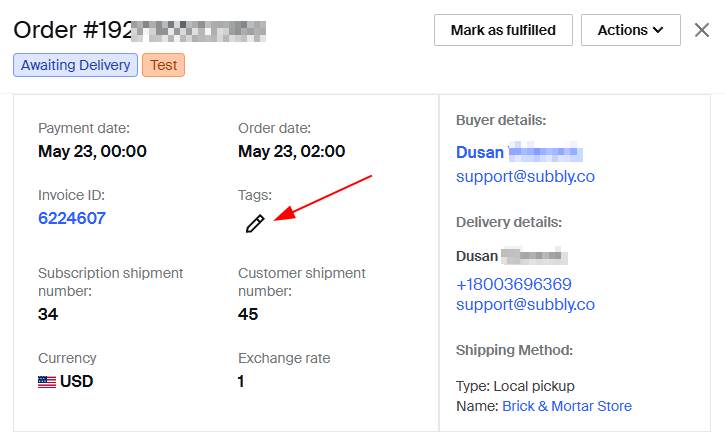
Tagging the Orders for easier batch management
Inside an individual Order summary, click the pencil icon to add tags.
Let's say that you need to batch archive/cancel specific set of orders created in between two dates. Once tagged, you are able to use that tag to internally filter these orders and apply batch cancel/archive order against the selected batch of orders.
Filtering with Tags
Once tags are in place, use them to filter views in your Subbly admin dashboard—very useful when managing large product catalogs, customer segments, or time-sensitive orders.
Advanced Filters menu at the Orders, Customers, and Subscriptions Lists has the option to filter by tags, which will certainly help you save time and quickly differentiate groups.
In this instance, it's always recommended to use tags when you want to have a more granular segmentation due to an exclusive offer, a sales season, limited edition products, etc.
Please note that in the Orders section, you can also use our stacked filters capability to filter multiple parameters at the same time. To learn more about this, go HERE.
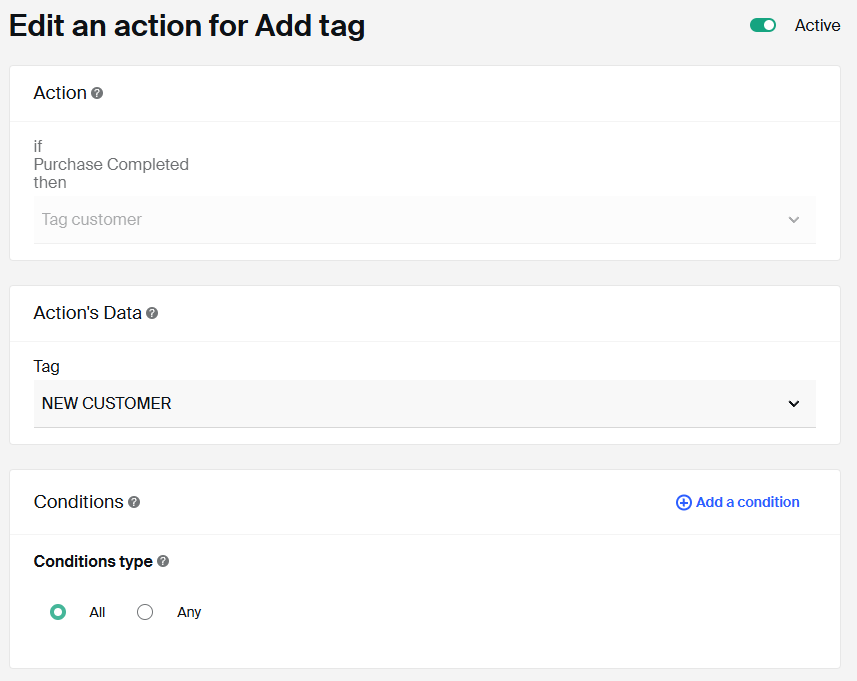
You can set up automation to assign tags automatically. For instance, this is the example of automatically adding "NEW CUSTOMER" tag to your customers after a successful purchase:
Trigger: Purchase completed
Action: Tag customer as "NEW CUSTOMER"
Practical Uses for Metafields
Metafields are mostly used in conjunction with the AI Website Builder. They can help with filtering, sorting or segmentation of products on site or they can also help build beautiful checkout flows for curation style businesses (read Important Considerations section for more info on how this works logistically).
Here are some practical use cases of using metafields for the site build:
Using Metafields for filtering the bundle items
Read more on how to build customizable bundles here. Check the tutorial on how to build bundle product pages using the new AI Builder here.
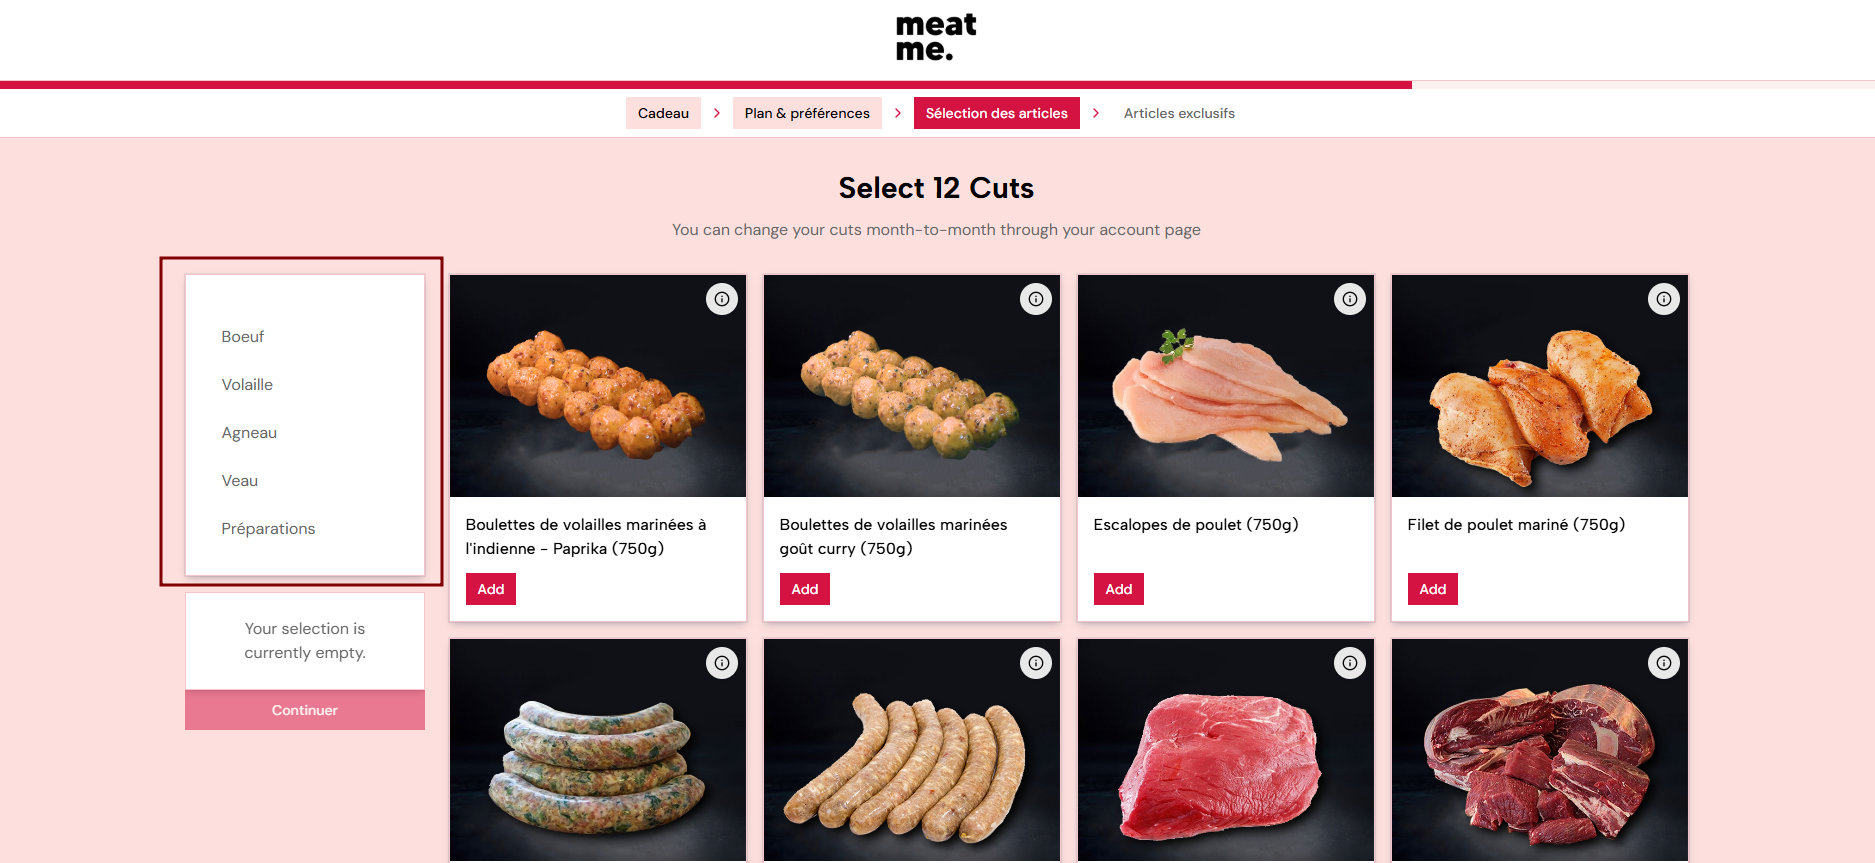
When creating a bundle page for the product, you might want to add filtering for the one-time products that are constituting the bundle, so that customers can easily filter different product types while at the checkout. Example is in the image below:
To achieve this, you need to:
Create the Metafield for Single-line text and
Add metafield to one-time products constituting the bundle
Instruct the AI Builder's agent to fetch metafields from the API and apply filtering on the bundle page based on the metafields
Similar to this, you can filter the products by weight, by value (for clothes subscriptions) or by any other metafield type.
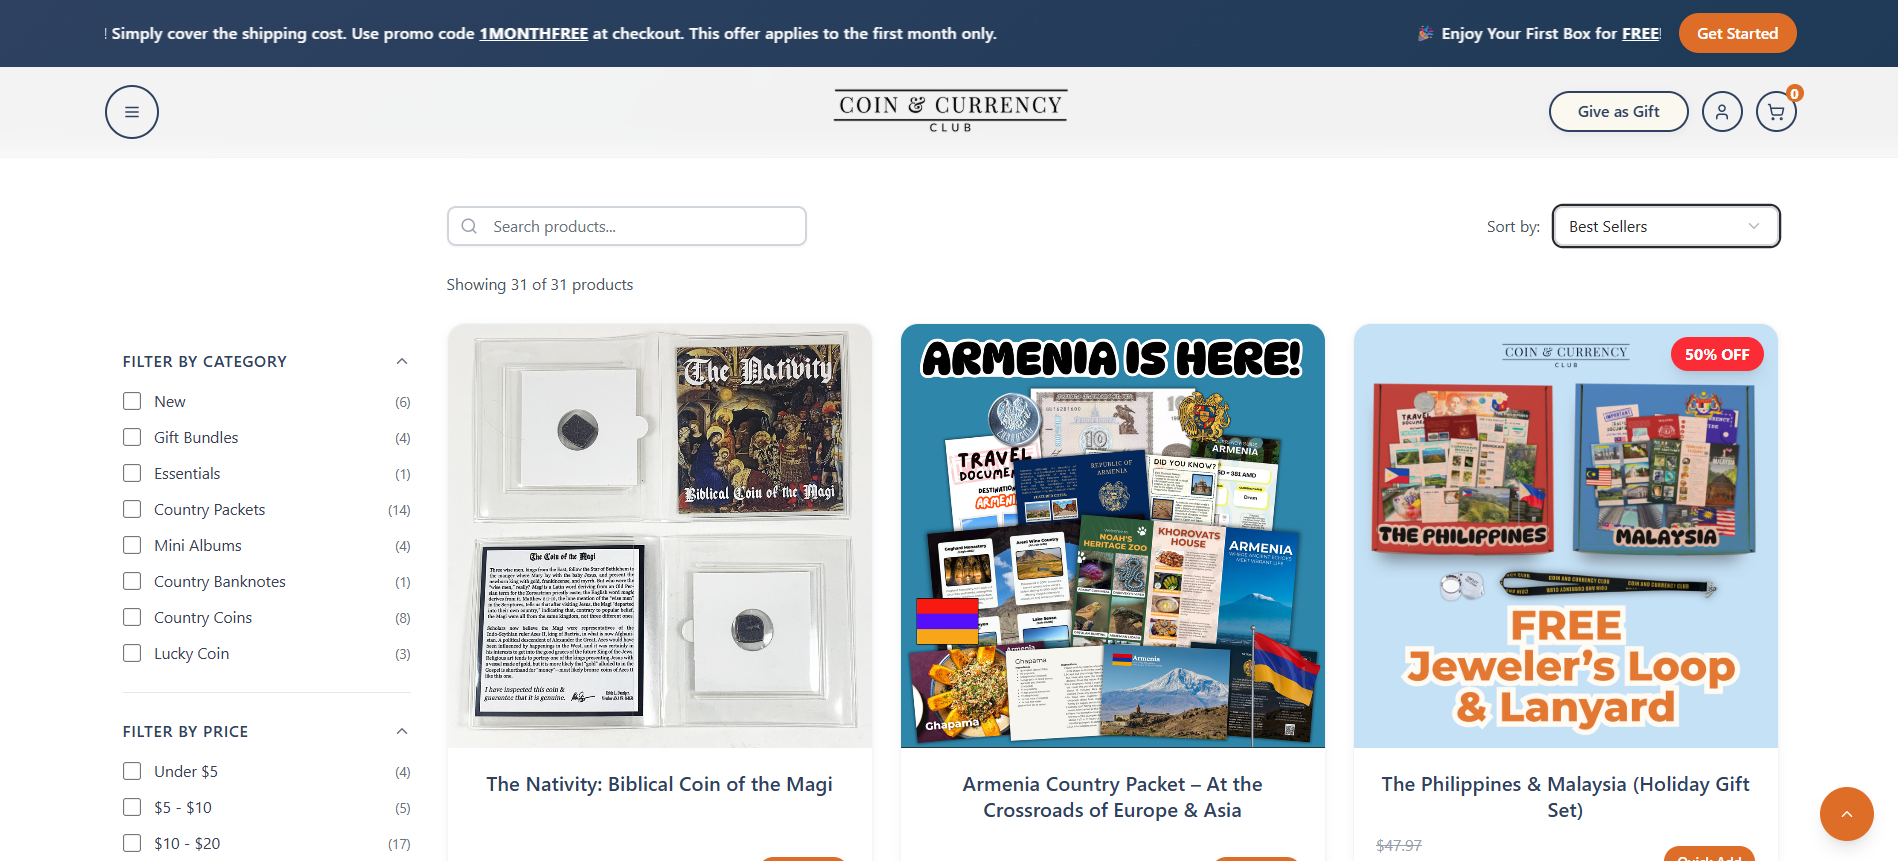
Apply one-time shop filtering using metafields
You can build robust one-time stores and apply different filtering or sorting logic based on the predefined metafields for the products. Below you can find an example of the one-time store that has filtering applied based on 2 different metafield types.
To achieve this, you'll need to:
Create metafields using Single-line (for Category) and Money (for price) metafield types.
Assign different metafields to each one time product included on the store
Instruct the AI agent to apply filtering categories based on the metafields fetched from the backend
Instruct the AI agent to apply sorting on page based on the date the products were created (fetched via API) or based on the price
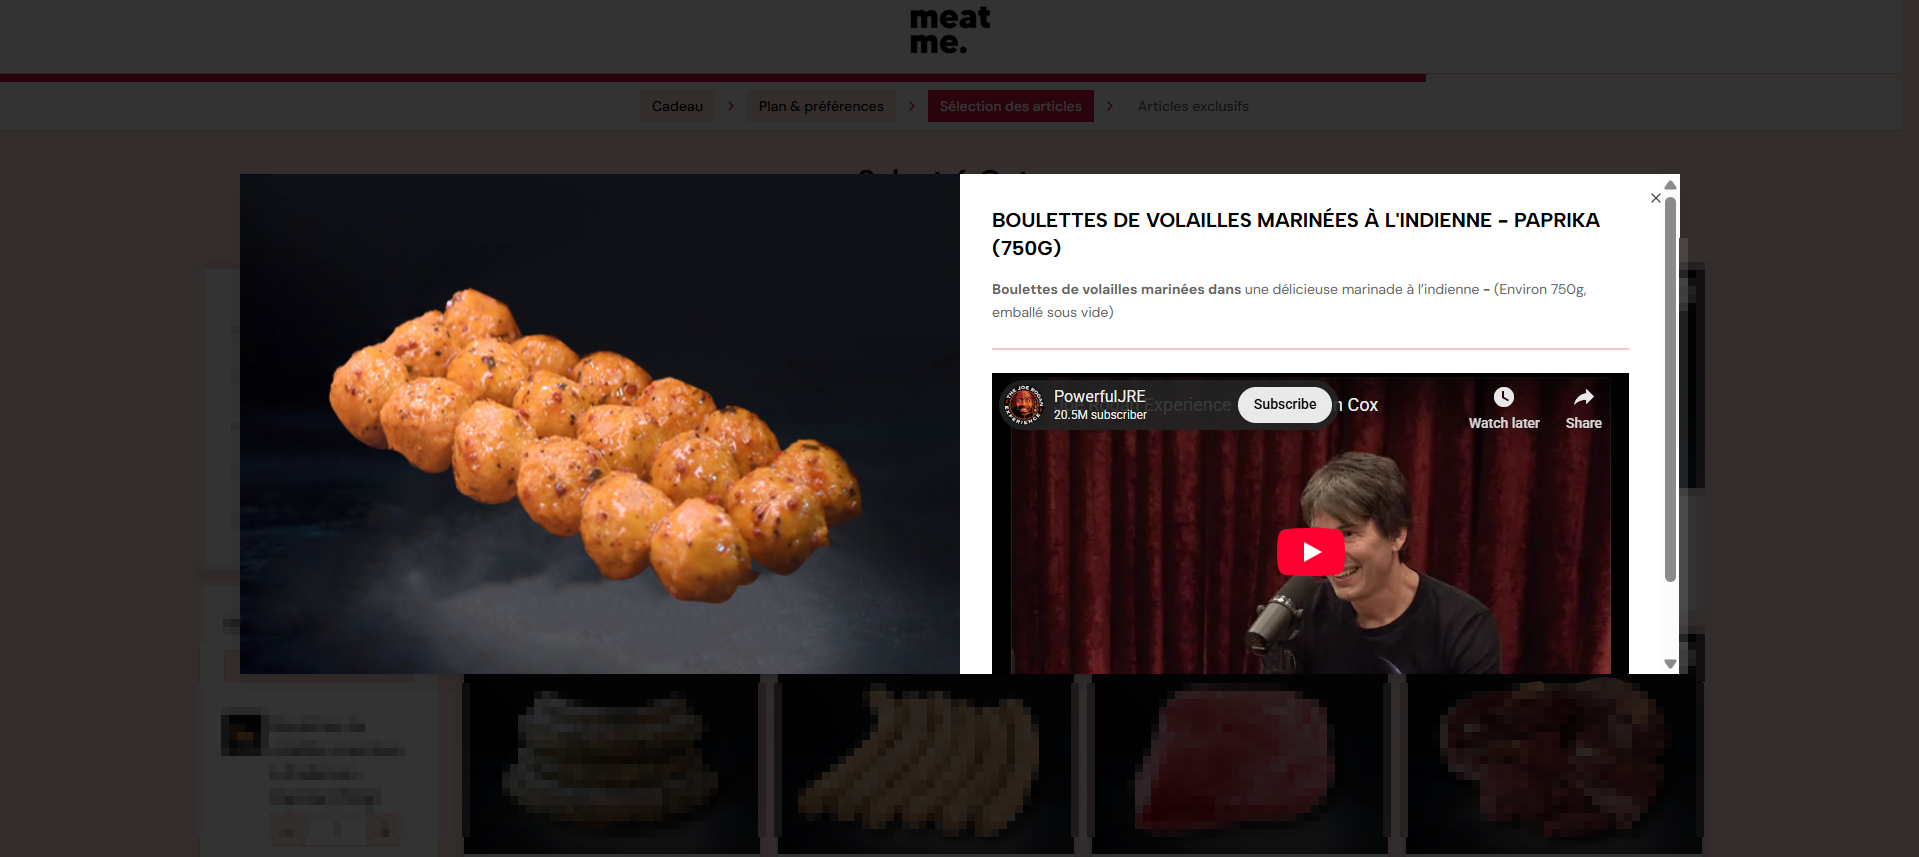
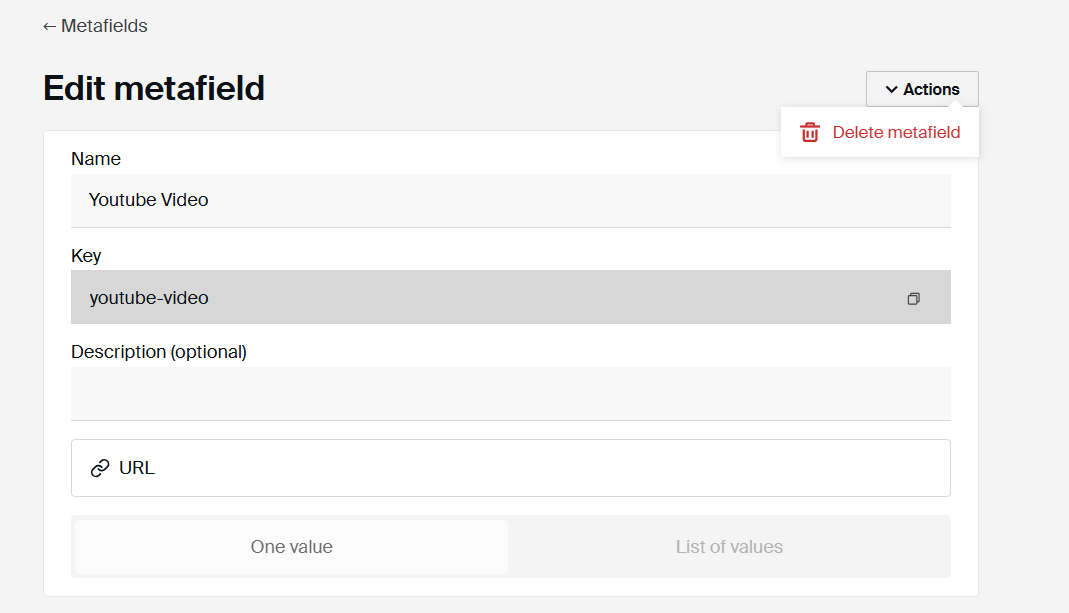
Add dynamic variable to the product description
You can use metafields to fetch unique values for each individual product that can be then used to instruct the AI Agent so they are displayed on individual product pages. As an example, you can add Youtube video to the product's description as in an example below.
To do this, you need to:
Create the metafield with the type of Video
Add the metafield to the product (you will be prompted to add the URL to the video when adding it to a product)
Instruct the AI agent to include the Video metafield (fetched from the Storefront API) when creating the product page
In the similar fashion, you can include any other dynamic variable that will be displayed for specific products across site. For example, you can instruct the builder to add a badge to each product's picture specifying the specific weight of the product.
Deleting Tags and Metafields
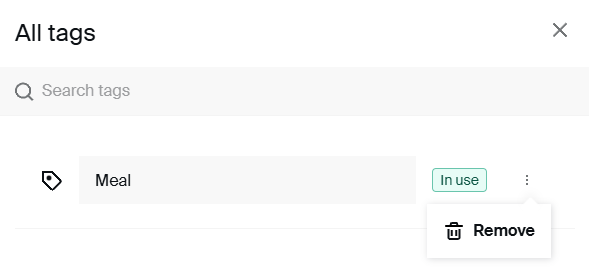
To delete tags, go here, click the three-dot menu next to the tag and select Remove.
Deleting a tag removes it from all products, orders, and customers it is assigned to.
To delete metafields, go to a specific metafield, click on the Actions drop down and select to delete.
Important considerations
When using metafields on the checkout, the customer's preferences collected via metafields will be saved and visible on the order's slip. However, Metafields are not subject to change via customer portal (in the same way survey preferences are) so this might not be an ideal solution depending on the business model.
Similar to this, metafields are not passed to external platforms (such as Shipstation or Pirateship). Therefore, if you rely on preferences collected for fulfillment, we advise using Surveys.