Customizable bundles

Bundles allow you to bundle multiple one-time products to create a unique build your box type of experience for your customers. There are different types of bundles - fixed (preset) and configurable (customizable). This article explains the usability and the setup of customizable bundles.
What are configurable (customizable) bundles?
Configurable bundles are letting the customer mix and match different products included in the pool into one big bundled product. This powerful feature will enable your customers to easily build their own box by picking from the selection of items pre-configured in the bundle builder.
Main difference between configurable and fixed bundles is the fact that customers get to choose what gets included in their box when it comes to configurable bundles. This calls for an ultimate curation experience!
Use cases
Meal Kit Bundle - Similar to Hello Fresh, build a checkout experience where customers will be able to pick and choose from the selection of meals and desserts. Let them choose plans for 2/4/6 people, with meals being delivered weekly/every other week..
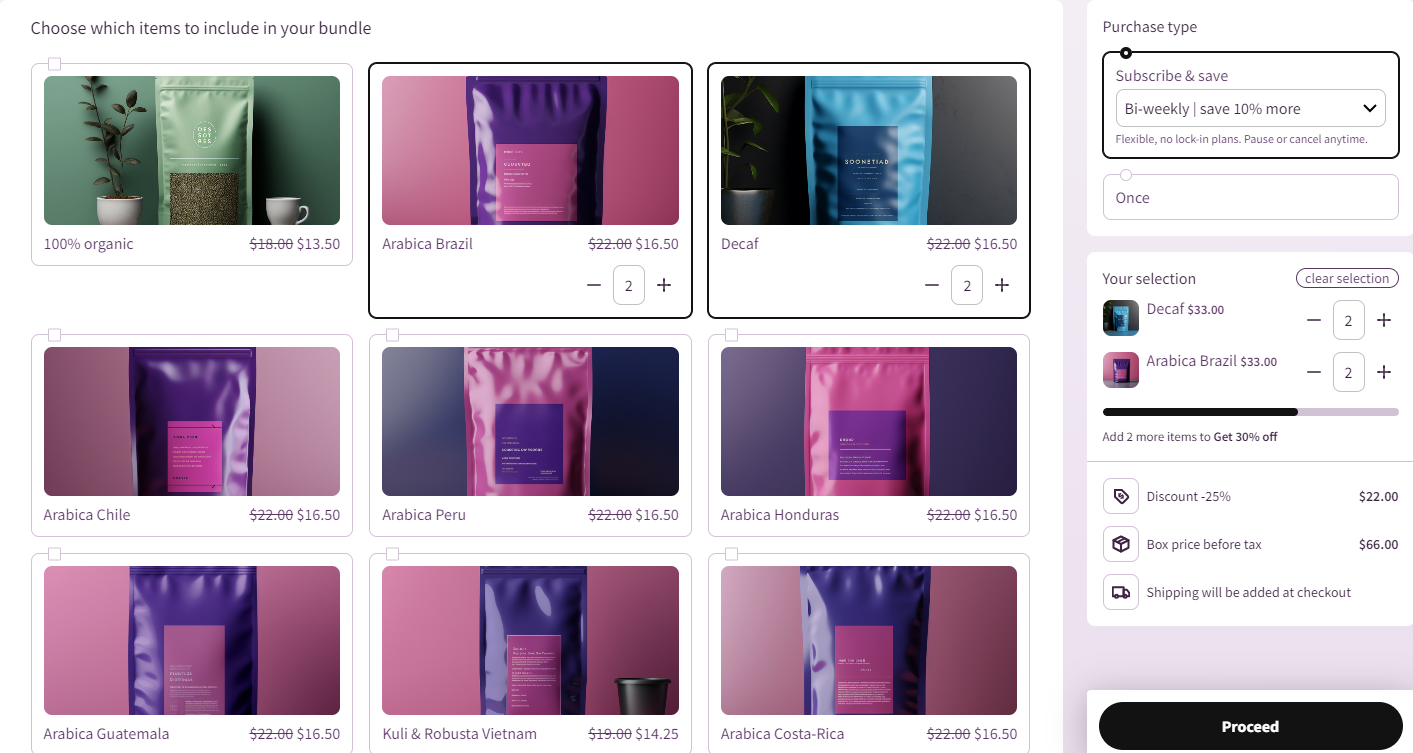
Subscribe and Save model (Coffee subscription example) - Explore this pre-built coffee subscription example showcasing prime example of a subscribe & save model built using configurable bundles.
Build-a-box model - Explore this pre-built example showcasing standard build-a-box business model built using Subbly's configurable bundles.
Setup
To setup a bundle go here and click opt to create a bundle.
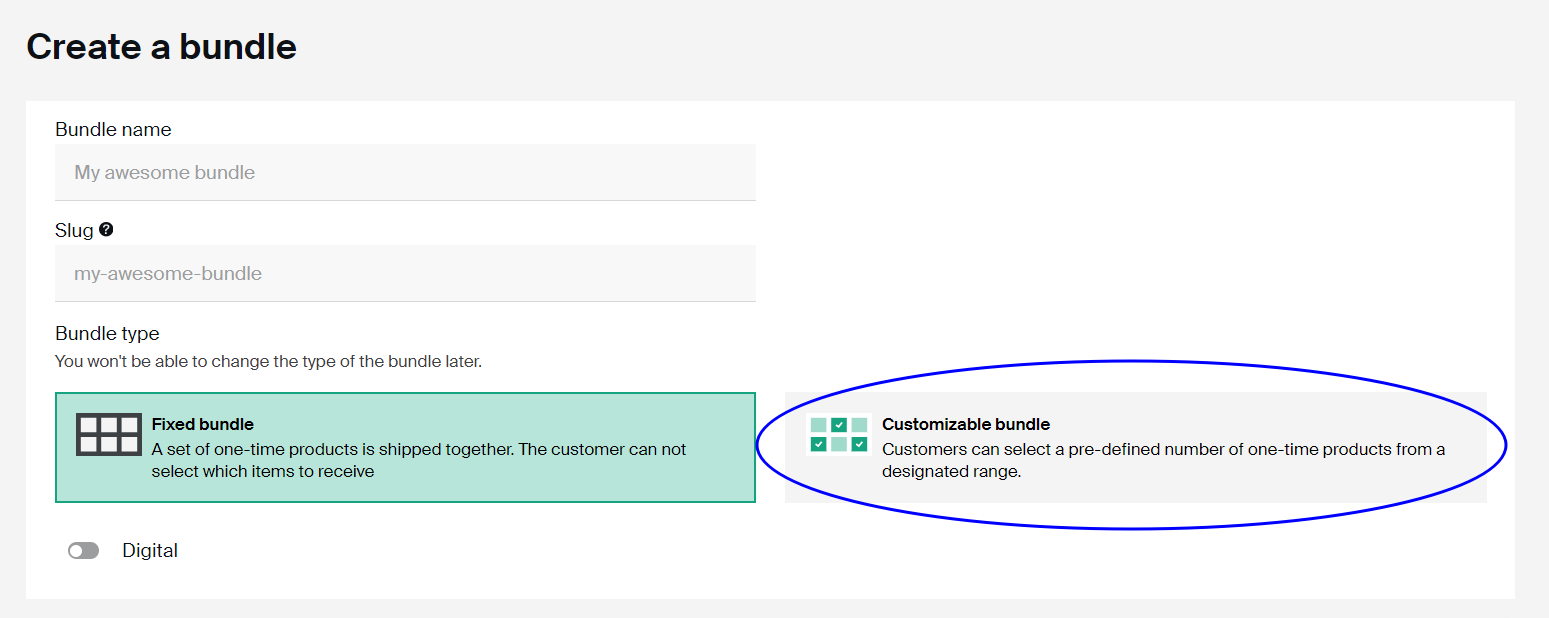
Give your bundle a name and a slug will be automatically populated based on it. To build the customizable bundle, please choose the Customizable bundle option inside the Bundle type selection.
Settings tab
On the next window (Settings tab) you will be able to redefine the bundle name again and add additional description for the bundle which will be presented on the bundle page on the frontend of your Subbly website.
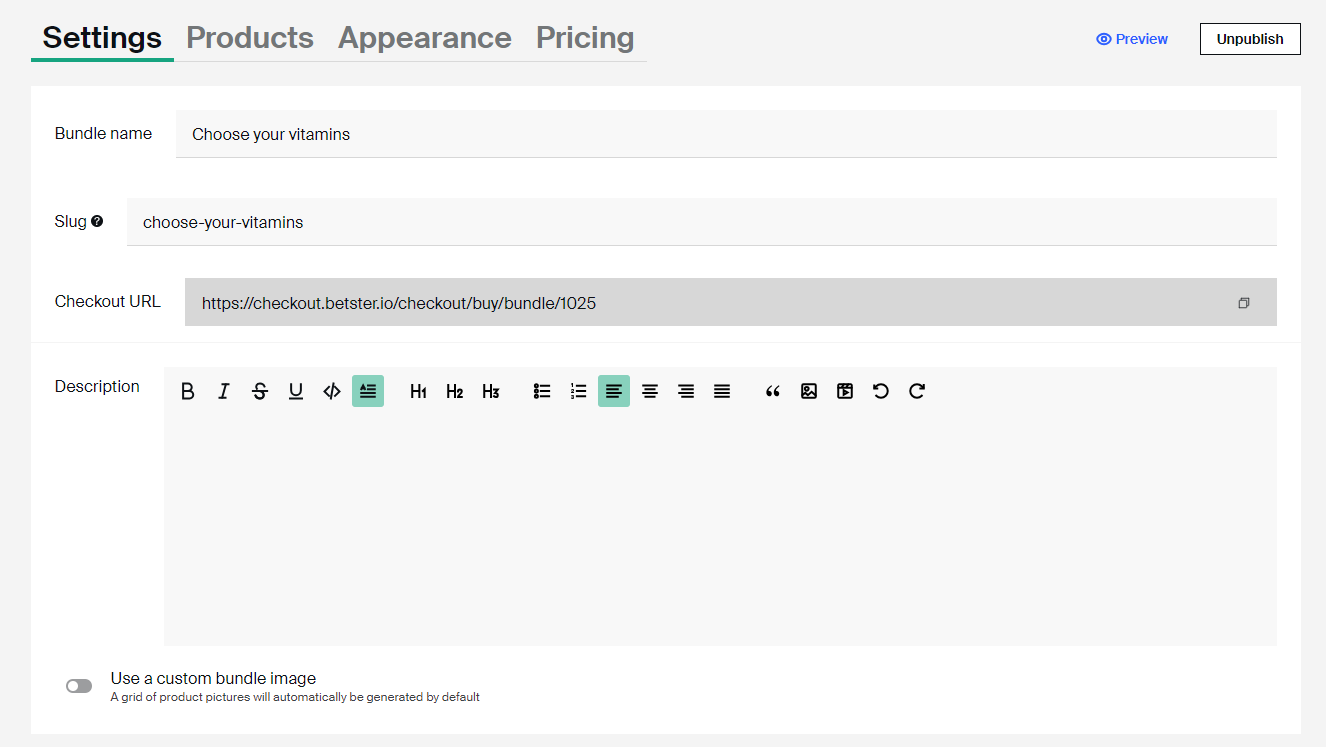
If you want your bundle to have a proper product/bundle image, please make sure to use the Use a custom bundle image toggle and to upload the image for the bundle which will be presented on your site's bundle page, as well as on the checkouts.
Make sure to save and proceed to the next tab (Products)
Products tab
Now you're on the Products tab. This is where you get to add the products to the pool of products so your customers can pick and choose from them when on the checkout. Go ahead and use the drop-down to add one-time products to be included in the bundle.
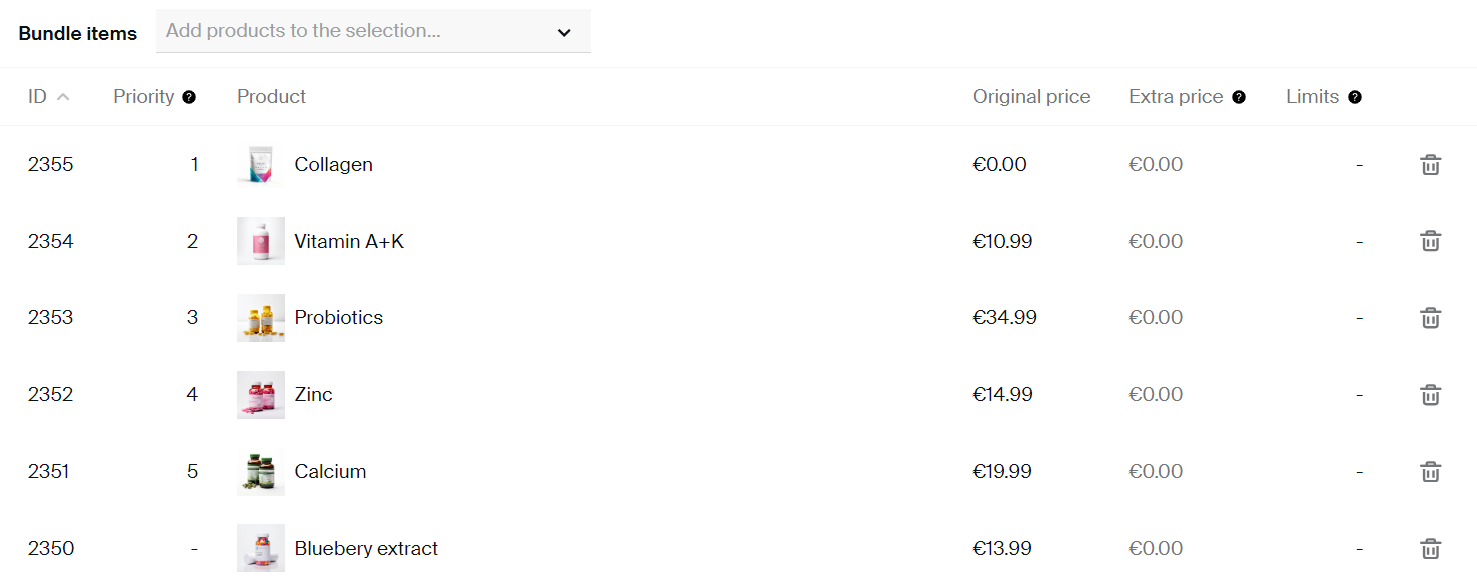
Original price of each product is pulled from the backend, ie., this is the price of the one-time product previously created on the backend and included in the bundle pool.
Extra price column is where you can increase the individual price of each item included in the box. In our example above, collagen product was created as a free item, however, you can add extra price to it to increase the price of an item when it's included in the bundle.
Limits column is used to set a limit of items that can be included in the bundle. As an example, you can limit the customers to be able to include more then 2 items of each product, in which case you'll need to set the limit for the particular product to 2 as in the image below.

When you're done configuring this step and adding products to the pool of available products, proceed to the next (Appearance) tab.
Appearance tab
This is where you get to decide on the layout of the bundle selection steps on your checkout. Different layouts are applicable and more suitable for different business models, you might want to iterate different layout options for better conversions.
By default, 4 different appearance layouts are available for bundles.
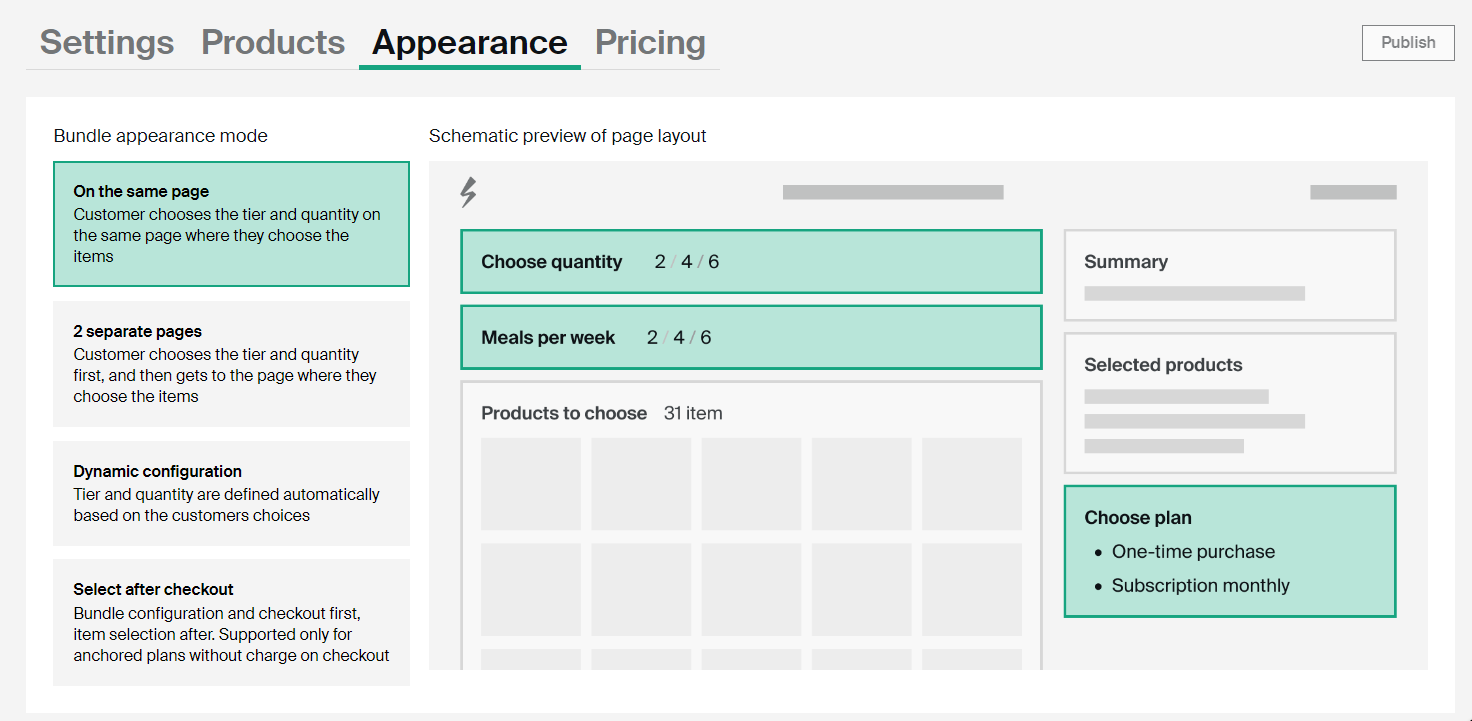
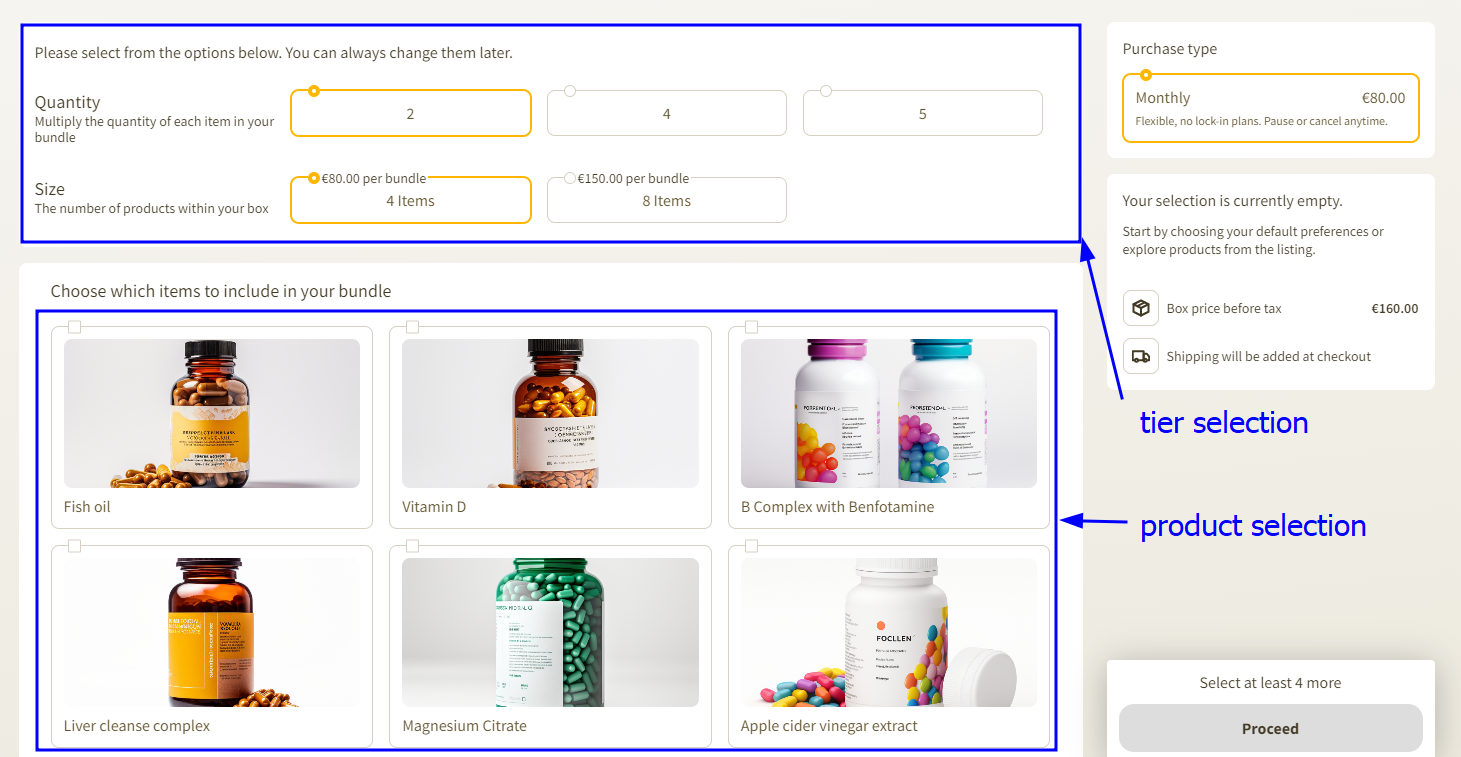
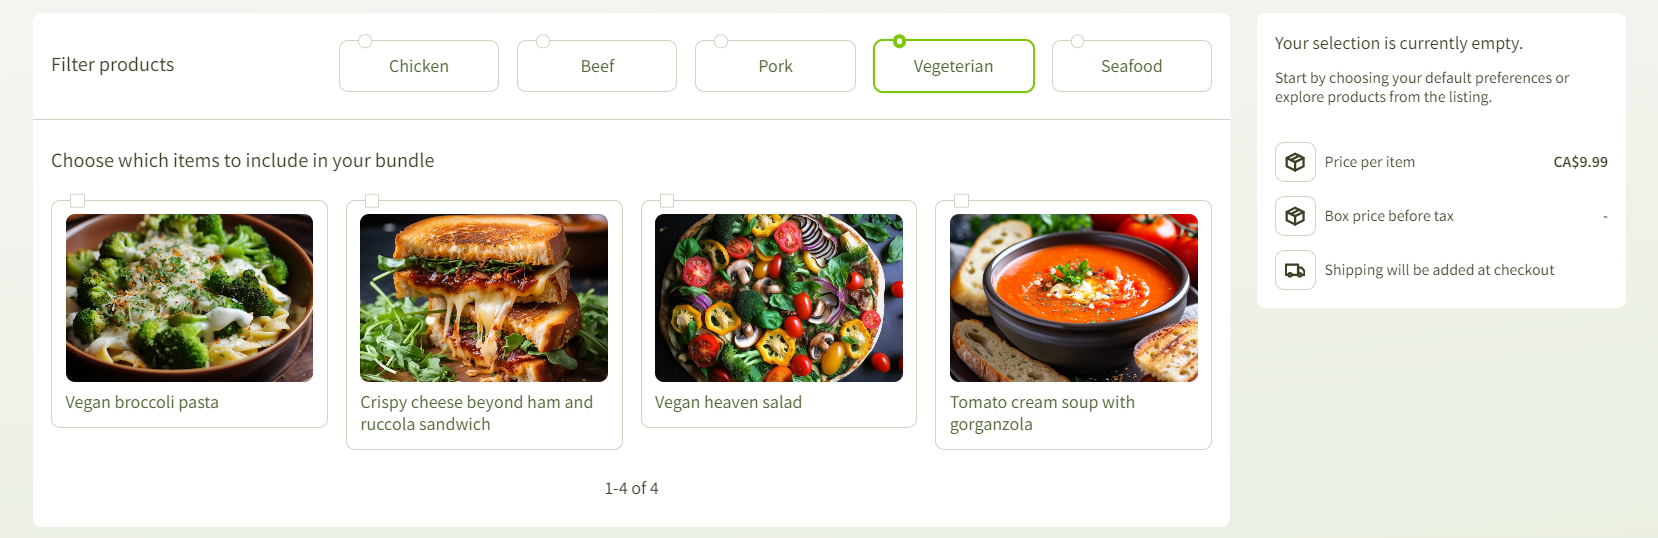
On the same page - gets the product selection for the bundle as well as tier selection for the bundle included on the same page. Customers will get to choose both the tier as well as products and quantity of products included on a single page. This might be better for conversions as it removes additional step(s) from the checkout. Example can be found on the picture below.
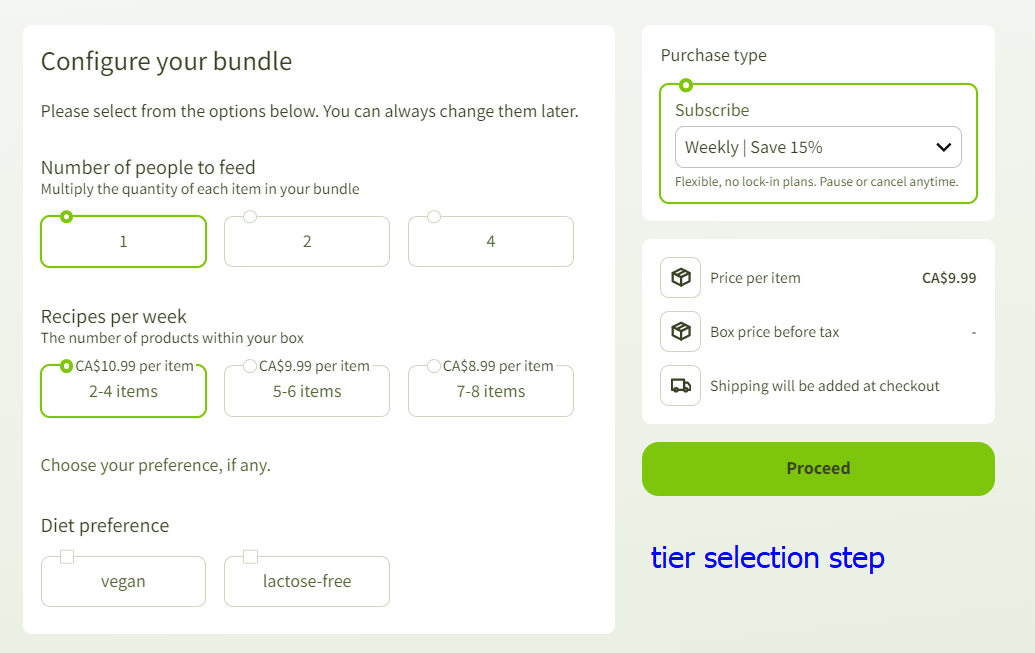
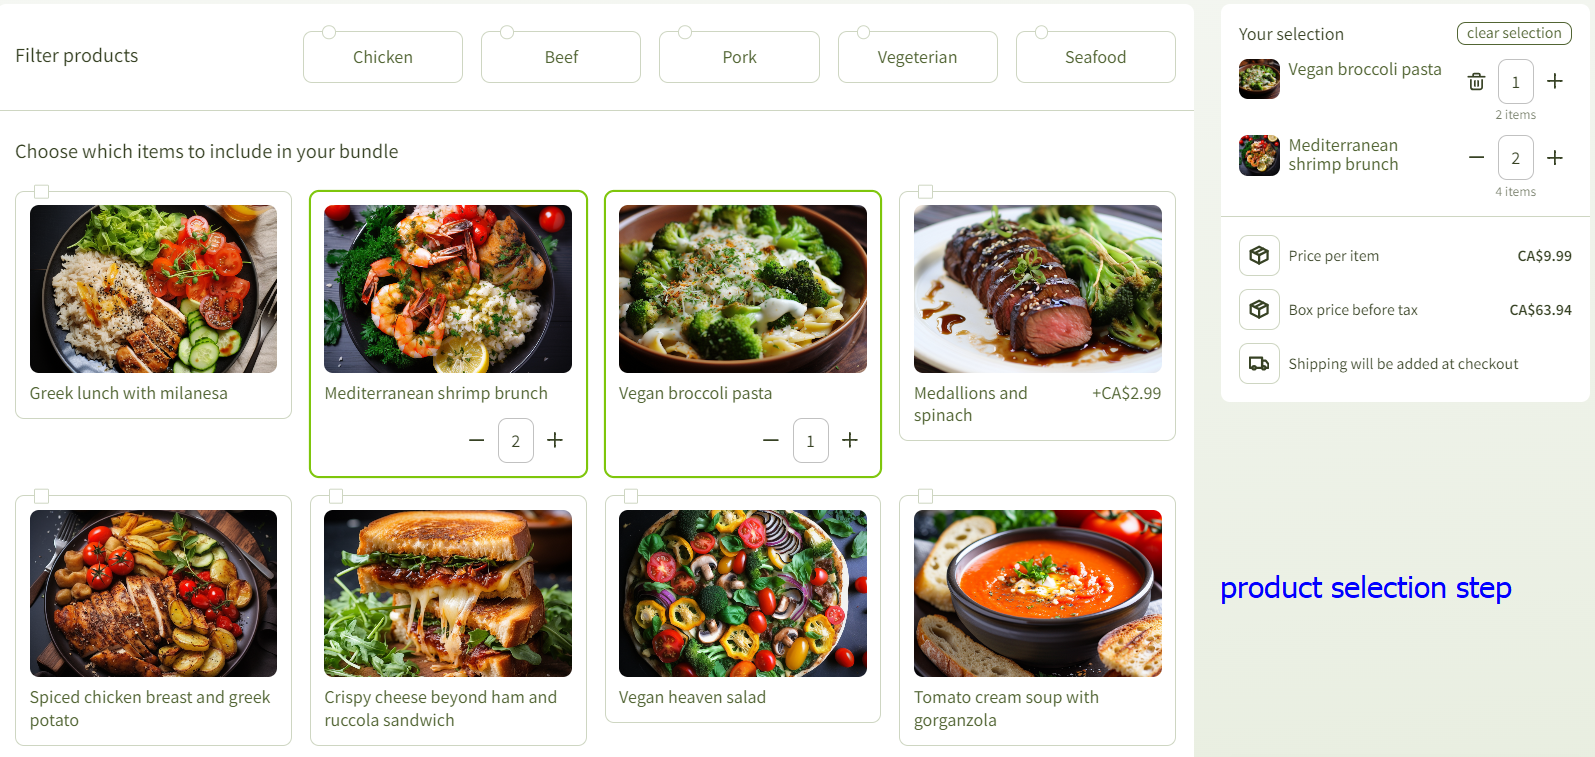
2 separate pages - tier selection is here separated from the product selection widget. Calls for a bit cleaner layout at the checkout but increases the number of steps at the checkout. Example below.
Dynamic configuration - Doesn't include the tier selection step. Instead, it automatically adjusts the tier based on the number of products included in the bundle. Customers get to dynamically add/remove products and adjust quantities at the checkout. Bundle tier is adjusted automatically based on the bundle setup. Example can be found below.
Select after checkout - this is a very specific case where the product selection step can come only after the payment was actually processed by the customer. Customer can get to choose the tier selection with pre-defined bundle prices pre-checkout and get to customize the bundle only once the payment has been collected.
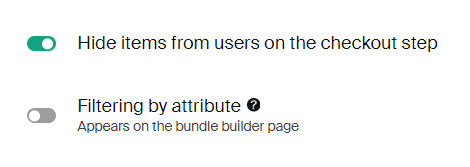
Filtering by attributes option on the appearance step makes it possible for you to build filters for bundle items at the checkout. Attributes will need to be pre-configured on the separate section of the admin here.
After choosing the appropriate layout and appearance for the bundle layout widget, let's proceed with setting up the pricing and tiers for your bundles. Please proceed to the Pricing tab.
Pricing tab
Now is the time to set billing/shipping frequencies for your bundle. Pay attention that you can offer a bundle both as a subscription or as a one-time product (or both, thus replicating the subscribe and save business model). Go ahead and specify whether you'd want your bundle to be a subscription product or a one time. Configure billing/shipping frequency if it's the subscription product or characteristics and price point of the one-time product bundle option.
Important considerations when setting up pricing options for the bundle:
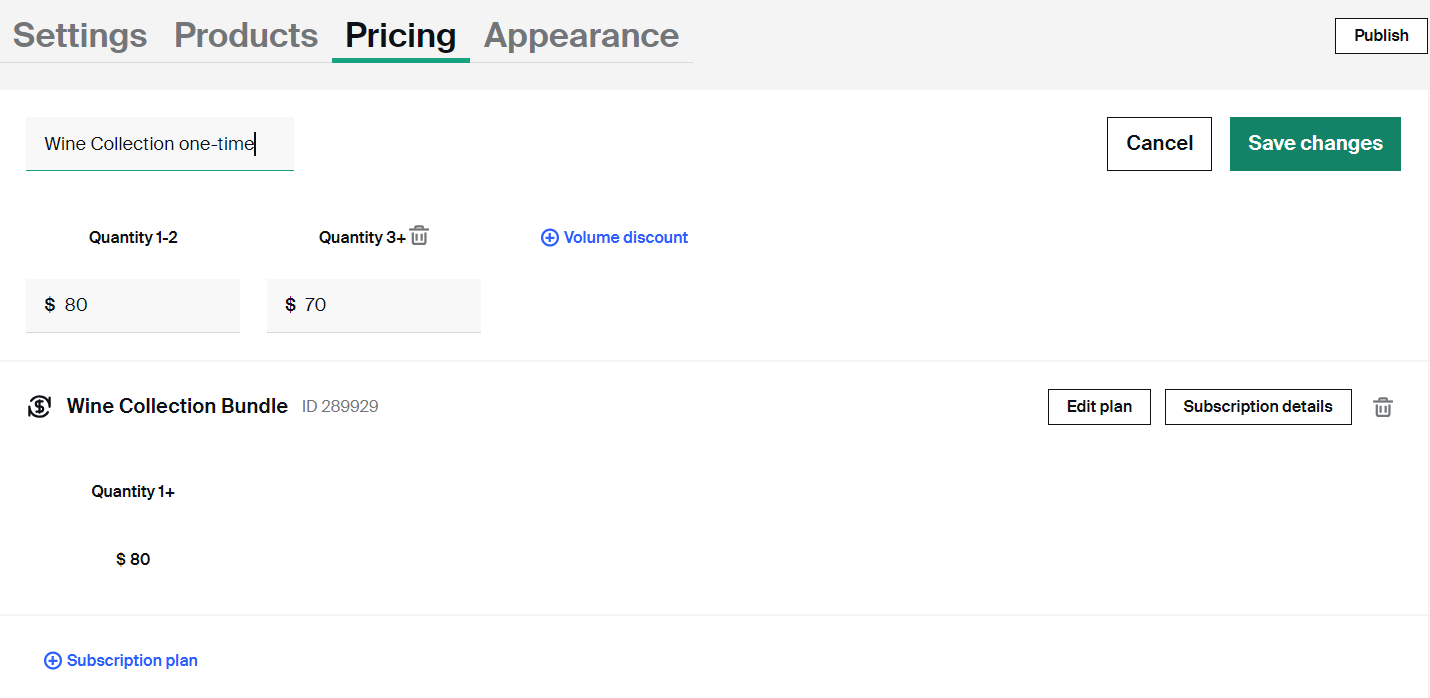
- you can add as many subscription plans to it as you want (think adding it as monthly, quarterly, annually...)
- you can add only one one-time option to the bundle
- you can specify quantity discounts (volume discounts) for the bundle
- you can add volume discounts for subscription product as well as customers will be able to subscribe to multiple subscription items on the checkout at the same time
- when creating the subscription plan for the bundle, you will be presented with the same widget you're being created with when creating a regular subscription product
Let's say that you're offering a bundle which ultimately consist of only one product - one bottle of wine for example. If you want to incentivize people to get a discount if they buy multiple items of the same product (3 bottles of wine or more) you can set different price points for different volumes of items sold!
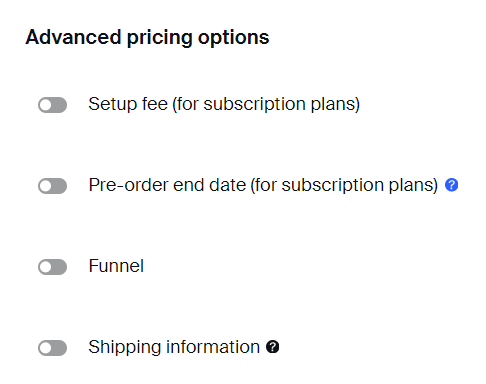
Looking into Advanced pricing options (picture below) lets you combine the bundle with some standard (or advanced) Subbly features such as:
- setting up a setup fee (one-time payment charged immediately after the checkout) for the subscription plan of the bundle
- setting up a pre-order end date (so the first payment gets prolonged)
- adding a funnel to the bundle checkout (very powerful for increasing the AOV immediately on the checkout by adding some complementary product offerings)
- configuring a different shipping information for the bundle (presented on the thank you page of the customer's checkout
Once you've configured everything, proceed to the next step (Appearance tab)
Have any questions? Make sure to reach out to support chat for answers!